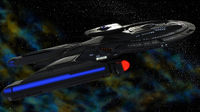
Both Sides Now (Artemis)
| USS Artemis-A | ||
|---|---|---|
 ACTIVE STATUS | ||
| ||


"The energy field this thing generates can fragment reality at the quantum level and then collapse it around its target. When directed at a ship, or a planetoid, or- ::beat:: a person, the prismagon’s energy essentially forces them out of reality, particle by particle. Colonel, we’re going to steal one."
- Major Didrik Stennes
Thirty years ago, the Interstellar Commonwealth made first contact with the Shint, a mysterious race with possible extragalactic origins. The warlike, technologically-advanced Shint have no desire for peaceful coexistence, and after a brief cold war between the two, the Shint launched an all-out campaign of terror against the Commonwealth. Their first target, Cardassia, was wiped off the galactic map within minutes. The next day, Bajor was destroyed, along with the recently-discovered wormhole.
Now, after three decades of nonstop warfare, the Shint have all but prevailed. The Commonwealth has only a handful of ships and star systems left under its control, and even the most optimistic projections show the Commonwealth will fall to the Shint within a year. The crew of the CIC Desdemona, one of the last functioning Commonwealth ships, wonder how much longer they can defend their collapsing state against a vastly superior and ruthless enemy.
The Shint have a weapon capable of manipulating the fabric of reality, against which the Commonwealth have no meaningful defense. Using this tenebrous, evil weapon, the Shint have chipped away at the Commonwealth’s territory, conquering one planet after another. With all other options exhausted, the desperate crew of Desdemona must steal one of the reality-warping weapons, in a last-ditch effort to tip the scales of war in their favor.
| First & Last Sim | |
|---|---|
| Hot Yogan | First Sim - Written by Yogan Yalu on SD 240009.09 |
| Off With Them | Last Sim - Written by Addison MacKenzie on SD 240012.01 |
Act 1
Planning
Aboard the CSC Overdone, Majors Didrik Stennes and Yogan Yannick were on their way to rendezvous with the CIC Desdemona, carrying intel vital to the waning war effort. The shuttle was, however, waylaid by a Shint warship, and Major Stennes watched helplessly as a distracted Yannick was caught in a discharge of the Prismagon - the Shint's reality-altering weapon - and killed in action.[1]
Major Stennes made it back to the CIC Desdemona with the intel, and briefed its crew on their next, and possibly final, mission. They needed to steal a Prismagon from a Shint Warcruiser. Lt. Colonel Adea was to spearhead a team consisting of Captain Yellir and 2nd Lieutenants Kuva, Lux and Thevn, assisted by Jovenan, to develop prismic shielding for a small shuttle and an away team intended to sneak aboard the war cruiser and retrieve the Prismagon. Meanwhile, Captain Olivera and 2nd Lt. Flint Kader had to find a suitable target for the heist, while Major Dakora, 1st Lt. Sato, 2nd Lt. Savel, Colonel MacKenzie and Major Stennes put together a plan for the heist, complete with contingencies for any complications that might arise.
- Shield Team
Lt. Colonel Adea's team went to the Tactical Laboratory to get an idea about their preferred approach to the adaptation of the Prismic Shielding. While there, the team split into several smaller units depending on their focus. Lux and Jovenan focused on the shuttle shields, working on the idea of modifying the prismic shielding into a portable solution to allow the infiltration unit more options while aboard the Shint vessel, while Thevn and Kuva brainstormed an idea for making the prismic shielding capable of both confusing the prismic scanners and act as protection against common Shint weaponry. Colonel Yellir was confident the plan could be put into work, and suggested equipping the shields with backup batteries to ensure that the infiltration team would be covered for the entirety of the mission.
As the team started discussing how to actually implement their plans - outfitting the shuttle, updating anti-Shint coding and actually creating the shields - 2nd Lt. Kuva revealed something concerning. The Shint had not reshuffled their codes in more than two months, which was irregular to say the least... Had the aggressors gone complacent, or was the Desdemona being lured into a trap? [2]
- Target Acquisition Team
Captain Olivera and Lieutenant Kader were in charge of selecting a target for their Heist. Captain Olivera contemplated the value of lying in wait in the Azure Nebula, obscured by the natural phenomena, while Lt. Kader suggested a daring target for them. An Atraxia-class Warship. Large and powerful, yes, but without an escort to harry the Desdemona if things went south. Knowing that the CIC Othello - one of Olivera's previous postings - was in the area, they contacted the vessel for their latest scans of the Atraxia's patrol route, hopeful that these scans could aid them in plotting a good approach vector for the incoming heist. Within an hour, Colonel Thera MGia of the CIC Othello, an old flame of the Human Captain, appears on a safe comm-link and agrees to share their sensor logs with the Desdemona to better their chances of success. The information, however, concerns 2nd Lt. Kader: The Othello is in their mission area, and is moving far slower than its max speed. If it comes to a firefight with the Atraxia vessel, it is very likely that the Colonel MGia, the Othello - and his daughter - will be caught in the crossfire...[3]
- Infiltration Planning Team
Sato, Savel and Dakora examined holographic displays of Shint Warships, trying to find out how to breach the vessels. While initially considering breaching through the sensitive sensor array - thus achieving both entry and a blinding of the vessel, they also considered disabling the ship weapons, to give the Desdemona more leeway. Colonel MacKenzie urged for simplicity, focusing on the likely success of the infiltration team, which focused the following planning. Using some of the scans that Major Stennes had been able to steal away with, it was likely that they would be able to create 'sensor echoes' of the shuttle, hopefully confusing the Shint sensors for long enough to allow the shuttle's approach.
Through brainstorming, the team arrives at a plan for the Heist Team Shuttle to feign at being a group of deserters, shot dead by the Desdemona. Then, while the enemy ship is distracted by the larger threat, the 'inert' shuttle can quietly drift closer, steal the Prismagons and get out of there. A risky plan, but one that might just be insane enough to work. The battleworn Major Stennes still seems out of sorts though, and as he walks to the replicator to steel himself alongside the Counselor, his recurring nightmare nags at him. Who is the mysterious figure he sees every night, and what will happen when he's finally able to grab the extended hand?[4]
The Skirmish
- Desdemona Team: Addison MacKenzie, Genkos Adea, Didrik Stennes, Victor Olivera, Luana Yellir, Flint Kader, Kuva
Upon arrival in the Celendi Nebula, the Desdemona sends off half her senior staff to enact their ploy. After a 'threat' from Major Stennes against the 'deserters', Captain Olivera hits and seemingly disables the shuttle, prompting the approaching Atraxia class vessel to dispatch a fighter squadron to investigate. To cover the infiltration team aboard the CSC Don Pedro, the Desdemona engages the Shint fighters before they get wise to the plan, with Majors Stennes and Adea, as well as 2nd Lt. Kader, going outside in fighters of their own, joining Major Dakora's squadron in the direct attack. The World Ender and Desdemona exchange weapons fire multiple times, but while the Desdemona's weapons seem almost useless against the might of the Shint vessel, their opponents' weaponry batters the old Commonwealth Ship and all but tears through their shields. On his superiors' orders, 2nd Lt. Kuva starts to maneuever the ship into a debris field that Kader located during the planning session. The battles rages on as everyone involved awaits signs that the infiltration teams' endeavours were succesful, even as their every offensive move seems to barely make a dent in the Shint forces. Defeat seems almost certain...
- Infiltration Team: Area 'Romeo' Dakora, Harry Sato, Jovenan, Savel, Gila Thevn, Lux, J
Onboard the CSC Don Pedro and outfitted with the modified prismic shielding technology and communications badges that should allow compensation for Shint jamming tech, the team sets out from the Desdemona, playing at desertion. The World Ender sends out fighters to ascertain the status of the shuttle after the Desdemona's friendly fire, but an interruption from Major Dakora's fighter squadron interrupts their investigation. Meanwhile, on the inside, 2nd Lieutenants Lux and Thevn fix the hull damage caused by the Desdemona while Mediator Jovenan keeps an eye on the status of their prismic shielding. While waiting for the opportune moment to infiltrate the World Ender, Lux and Thevn also manage to get a passive communications feed through the defunct communication console, allowing the infiltration team to hear outgoing transmissions from the other vessels nearby. As Shint voices praise the glory of their Empire, Major Dakora kicks the shuttle into gear and propels it like a speeding bullet into the giant vessel, lodging itself into one of its sensor nodules.
Once inside, the infiltration party further splits up into two teams, with a shared mission. Get to a Prismagon Reactor, get the mcguffins and get back to the shuttle within five minutes.
Team Dakora: Leading Jovenan, Thevn and J towards the aft reactor, Major Dakora uses Thevn's knowledge of Shint ship design and protocol to avoid patrols. Upon arrival at the reactor, sensors read Shint lifesigns within, and the group decides to divide and conquer. Thevn and Dakora enter combat with the Shint guards, while Jovenan leads J to dislodge the core of the Prismagon Reactor. The Major gets pummelled by a previously unnoticed Shint, but Thevn manages to kill it and give the Major a temporary reprieve from the concussion he'd earned. Jovenan and J dislodge the core just as an alarm starts ringing throughout the World Ender, caused by the explosives set by Team Sato. Seeing as their cover is well and fully blown at this point, Dakora sets an explosive device of his own and leads his team back towards the Don Pedro. On the way back, their team encounters a group of Mizarian slaves transporting a replacement prismagon core. While the encounter remains peaceful, Dakora does relieve the demure slaves of their cargo while Thevn has an encounter with a Mizarian who seems to know of her. Once again en route to the Don Pedro, Dakora is hit in the leg by a stray Shint projectile, but before he can volunteer to stay back as a distraction instead of slowing them down, the explosive triggers and incinerates their pursuers.
Team Sato: Leading Savel and Lux towards the fore reactor, the team adopts the principle of 'kill them all' as they charge ahead. Eventually, this gets them stuck inside a room that sealed the doors and killed all non-essential systems once all Shint life signs within had faded... They have to find another way back once they have the Prismagon in hand, but for now, they continue on. Using a creative method of hostage-taking, murder and mayhem, the team puzzles their way to the Prismagon Reactor where Savel manages to dislodge the still burning hot core from the reactor. Realizing that their race against time won't be successful if they don't manage to deal with the pursuing Shint approaching them, Lux - who is the only one able to operate her brother's specially designed explosive devices - wishes her teammates good luck and decides to stay behind, taking down as many Shint as she can before finally succumbing to the explosive hellfire of her own devices.
The infiltration party reconvenes back at the Don Pedro with -2 seconds to spare, and lurches back into empty space with their precious cargo. An all-out war occurs once the Shint fighters are alerted to the cargo the reawakened shuttle carries, and seemingly for every impact to the prismic shielding, the prismagon cores grow brighter. The team aboard the Don Pedro becomes aware of the danger posed by their cargo just a little too late, and soon, a Reality Bubble originating from the stolen prismagon cores expand to envelop the Desdemona, the fighters and the World Ender itself. All onlookers say their prayers, ready for the end. Meanwhile, in a reality quite unlike their own, Commanders Adea and Yalu stare in awe at their viewscreen as a rift in space-time opens up and deposits a warzone in front of them, and a voice quite like their Captain's speaks to them from an unfamiliar vessel...
| Notable Sims of Act 1 | |
|---|---|
| Both Sides Now (SD240009.10) | Major Stennes makes it back to the Desdemona with a suicidal mission. |
| Ragnarok (SD240009.22) | Cpt. Olivera learns of his daughter's existence, and immediately puts it in jeopardy. |
| Universal Symbol of Defiance (SD240009.25) | Operation 'Get Ourselves Killed' is underway. |
| Holy Miriam Margolyes (SD24009.28) | Major Stennes, Colonel Adea and Lt. Kader board the Nurse-fighter craft. |
| Honey, We're Home!(SD240009.30) | The Don Pedro arrives on the World Ender. |
| The Shinty End of The Stick (SD240010.05) | Lux makes her final stand. |
| Two worlds collide (SD240010.06) | The warzone is transported to the Prime Universe, and Cmdr. Yalu attempts communications. |
Act 2
Following an extremely brief and one-sided altercation with the World Ender - where the Starfleet vessel obliterates the behemoth with barely a scratch for its troubles - the crew of the Desdemona are brought on board the USS Artemis to rest and recuperate before an eventual return to their own universe. While there, they face some uncomfortable truths, engage in social niceties with their counterparts from this galaxy (some more succesfully than others), and to some, the possibility of retiring to somewhere peaceful in this Shint-free galaxy is almost too great a temptation to pass up. During the course of their stay with the Artemis, Colonel Genkos Adea supplants his alter-ego, Cmdr. Adea, aboard the Artemis, while Lt. Silveira and Mediator Jovenan, in spite of their better judgments, kindle a possibly doomed romance. Meanwhile, Johnathan Kader enlists his alter-ego, Flint Kader, in a plot of his own, including an uneasy alliance with a Shint survivor from the World Ender in order to facilitate the journey home.
As the days pass and their impending return to their own reality approaches, one thing, however, remains clear: the crew of the Artemis is willing to repair the Desdemona and see to the physical health of its crew, but they refuse to aid in the conflict with the Shint in any way, effectively deciding to send their counterparts to their doom back in their original reality. Colonel MacKenzie refuses to accept this and announces the details of their next mission to her closest senior staff: The hijacking of the USS Artemis. [5]
- Computer Lab Planning Team: Addison MacKenzie, Genkos Adea, Luana Yellir, Jovenan, Kuva, J
- Armory Planning Team: Ares 'Romeo' Dakora, Victor Olivera, Harry Sato, Savel, Gila Thevn
Splitting the senior crew of the Desdemona in half for planning sessions, one half discusses the possibilities that comes with Colonel Adea's successful infiltration of the Artemis, as well as their chances at disrupting Starfleet systems. When faced with the very real possibility that her so-called allies from the Commonwealth will take over the Artemis and possibly kill the crew that assisted them in their hour of need - including Lt. Vitor Silveira - Mediator Jovenan makes a tough call and tries to warn the Artemis through alternating the heat levels of the computer core. It was a gamble - a communication written in Edo and utilizing a system that no normal person would be surveilling - and the telepathic Colonel Adea, sensing the treacherous mind of the Mediator, outed her before the message was complete. Unbeknownst to everyone, J has been altered by his Artemis counterpart, allowing for some semblance of free will, and he too starts to work against the machinations of Colonel MacKenzie from within...
Meanwhile, in the Armory, Major Dakora brings in the remainder of the senior crew to discuss their options for taking the Federation vessel. 2nd Lt. Savel had used his likeness to Ensign Savel to gain access to the armory, and as such, the crew of the Desdemona had weaponry ready for the taking so long as they could get aboard the Artemis. This was an important part of the plan, as the transporters with which they usually crossed between ships didn't allow for bringing weapons aboard the Federation vessel. It was decided that the senior crew of the Desdemona would all cross over to the Artemis - playing at the guests they had been for the past week - after which they would all reconvene at the armory to procure phasers, and then start taking over key areas of the Artemis.
Meanwhile, aboard the USS Artemis-A, Petty Officer Xandeus Filistrien notices a strange heat fluctuation in the computer core. In his overzealous paranoia, he ascertains that it might be a communication, and if so - considering the crew makeup of the visiting vessel - a message in Edo. Bringing it to the attention of Lt.Cdr. Talos Dakora & LtJG Jovenan, a troubling message heralds the coming crisis, just as Colonel MacKenzie and a contingent of her crew are beamed aboard.
| Notable Sims of Act 2 | |
|---|---|
| Two households, both alike in dignity (SD240010.08) | Cmdr. Yalu considers the three days past since their rescue of the Desdemona. |
| Two for the Price of One (SD240010.09) | The two Adeas bond, and one is bound. |
| In Space No-One Can Hear You Scream (SD240010.16) | Colonel Adea skips the questions when needing information from his Prime counterpart. |
| Shades of Grey (SD240010.17) | Ares Dakora expresses concerns about the hijacking plan to Colonel MacKenzie. |
| Surprises (SD240010.17) | Lt. Silveira surprises Mediator Jovenan with a Holodeck ball. |
| A love letter of desperation (SD240010.22) | Mediator Jovenan betrays the crew of the Desdemona by attempting to warn the Artemis about the upcoming hijacking. |
| An Overzealous Defense (SD240010.26) | Petty Officer Filistrien notices a peculiar heat fluctuation from the Desdemona. |
| Linian vajos ren, jialon res (SD240010.28) | LtJG Jovenan translates the peculiar code intercepted by Intelligence, but it's only half-finished... |
| Southern Cross (SD240010.28) | The two Kaders head out into the stars and encounter a monster with a sense of irony. |
Act 3
Captain MacKenzie was greeted in her office by a man she believed to be her old friend and Chief Medical Officer, Cdr. Genkos Adea, but this man was in reality his counterpart from the Shintverse, who was intending to lure the Artemis' Captain into a trap. Meanwhile, Lt. Jovenan was headed to Sickbay to rendezvous with the Commander to discuss the effects of the prismic radiation, but she was met with no one but Ensign Sadar, who revealed that the Commander had stopped attending to his more menial duties in Sickbay. As the Ensign started filling in Lt. Jovenan on some peculiar ways that Commander Adea's behavior had changed recently, Lt. Jones and Ensign Savel were going about their days elsewhere on Deck 7. They were intercepted by PO Filistrien and informed of the impending attack, just as emergency lights trigger.
Captain MacKenzie, who's realized that something is off with the supposed Adea, tricks him and reveals his deception, which leads to an altercation between the two. The resultant phaser fire puts the Artemis into a ship-wide Red Alert, just as Major Dakora holds Chief Engineer Yellir at gunpoint in Main Engineering and J infiltrates the Hazard Lab and steals the container holding the prismagons, killing one of the scientists on duty at the same time. He meets up with Colonel MacKenzie who has Mediator Jovenan with her, both as hostage and as leverage, but they're soon intercepted by Security. To the Mediator's frustration, however, the Colonel proves quite excellent at impersonating her counterpart. The only option left to her is daring. Meanwhile, Lt. Silveira joins up with the Captain and the Colonel, who're facing each other down. Colonel Adea attempts deception, but it doesn't quite bite and Lt. Silveira ends up backing his Captain. Seconds later, Cdr. Adea's stolen combadge chirps with a request from the security team who's conversing with Colonel MacKenzie, and Mediator Jovenan's cry rings out. "She lies! She’s an imposter!"[6] Col. Adea - whose ruse is well and truly up - calls for her immediate execution, which triggers a vicious reaction from Lt. Silveira, but unbeknownst to the group, Mediator Jovenan is promptly disintegrated by Colonel MacKenzie for her treason.
Elsewhere, Lt. Jones and Ensign Savel, along with PO Filistrien, arm themselves and head towards Transporter Room One, where they've received news that a group of Desdemonan crewmembers - including their own counterparts - are attempting to gain access to the transporter system. They have difficulty approaching the Transporter Room due to hostile fire, but following an ingenius distraction by Ensign Savel, the group manages to infiltrate the disputed territory. This leads to a shootout between the two groups, which culminates with Lt. Jones sustaining an injury, the death of 1st Lt. Sato and the capture of 2nd Lt. Savel. 2nd Lt. Thevn, however, evades capture, but Transporter Room One is once again in Artemisian hands.[7]
At this time, Lt. Olivera broadcasts a ship-wide commmunication announcing his succesful takeover of the bridge, and calling for the complete surrender of the Artemis' crew.
Lt. Jovenan - who was already suspicious due to the irregular behavior exhibited by 'Commander Adea' - enlists Ensign Sadar on a mission of breaking-and-entering, in an attempt at locating the real Cdr. Adea. They locate him in his quarters, gagged and tied in the closer, and manage to rescue him, just before they receive a communiqué from Cpt. MacKenzie, who intends to retake the bridge from Lt. Olivera, and needs more able hands. The pacifistic Ensign Sadar hesitates, but a desperate Lt. Silveira pleads with her, and the group heads off. After pretending to be Desdemonan crewmembers having succesfully captured the Captain and Lt. Silveira, the group manages to retake the bridge and post up there in order to aid the liberation efforts. 2nd Lt. Thevn - who thus far had evaded capture - sets an explosive in Primary Sickbay, that catches Ensign Savel and Lt. Jones by surprise. The resultant explosion grievously wounds the Lieutenant, and Cdr. Adea beams down directly from the Bridge to go into emergency surgery. While unconscious, Lt. Jones has an out-of-body experience, where he does some soul-searching with an old friend of his - Kayla Drex - and while the surgery is a resounding success, a tired Cdr. Adea informs him that the road back to peak physical health will be long and arduous. Lt. Jones takes these news with surprising ease, feeling a new sense of inner peace and purpose after his hallucination(?).
Elsewhere on the ship, Lt.Cdr. Dakora stares down Colonel MacKenzie. His interrogations as to her identity are interrupted by the appearance of "J", who - after learning of the demise of Mediator Jovenan - intends to forcibly execute the Colonel for her unjust termination of someone he considered a good person. Shocked by the brutality demonstrated by the Desdemonan cyborg, Lt.Cdr. Dakora's hand is forced and he assists the Colonel in killing the errant "J". He then attempts to subdue the Colonel, but she proves as tenacious as her Artemisian counterpart, and soon gains the upper hand. The Lt.Cdr. is saved by the timely arrival of Ensigns Kawarda and Chevalier, who eventually see through the Colonel's attempt at impersonating the Captain, and she is stunned for her trouble.
Chief Yellir - who's spent a significant amount of time as Major Dakora's hostage in Engineering - uses her cunning and her extensive knowledge of the Artemis 's systems to trick the Major into a trap. Cordoning him off in a plasma containment field, the Major suffers significant tissue damage. With their situations reversed, Chief Yellir calls for his surrender so that medical aid can be administered. The Major refuses - remaining certain of the Desdemona 's moral high ground - and attempts to retrieve a weapon to fight back, forcing the Chief to end his life... With the situation for their on-board infiltrators rapidly worsening, the remaining crew of the Desdemona attempt to flee the area, but with her own crew in charge of the bridge, the Artemis 's tractor beam easily halts the movement of the warworn vessel. This, unfortunately, provides a window for Colonel Adea - who has escaped custody of the security detail responsible for escorting him to the Brig - and he escapes the Artemis in a stolen Federation shuttle, while the bridge crew can do nothing but look on in frustration.
On board the Artemis, Crewman Renirs intercept a wounded 2nd Lt. Kader on Deck 11, and manage to use her sparse field medicine to save his life. With his apprehension, and the successful capture of 2nd Lt. Thevn on Deck 11, the Artemis' crew makes the prompt return of their treacherous guests a priority. But even as the Bridge Crew observes their successful efforts and the Desdemona returns to it's own universe, the crew grapples to reconcile the betrayal that occurred and the losses they suffered...
| Notable Sims of Act 3 | |
|---|---|
| Welcoming the Viper (SD240011.03) | Cpt. MacKenzie welcomes her CMO into her office, just as she learns of the looming threat posed by the Desdemonas. However, she remains unaware that Genkos Adea himself is a viper in disguise... |
| No Time For Deception (SD240011.06) | Colonel Genkos Adea's ruse is discovered, and the Artemis is put on Red Alert. Hopefully, it's not too late... |
| Red Handed (SD240011.07) | Main Engineering is infiltrated and Chief Yellir finds herself in a dangerous position (or two). |
| Code Red (SD240011.07) | Lt. Jovenan and Ensign Sadar realize that 'Commander Adea' isn't who he seems. But where is the real one? |
| Nothing stains the soul more indelibly than killing (SD240011.08) | J infiltrates the Hazard Lab, with fatal consequences for the scientist on duty. |
| Freedom! (SD240011.11) | Cdr. Adea is let out of the closet by his home-invaders. |
| He will be there for me (SD240011.11) | Mediator Jovenan takes a chance on love... With dire consequences. |
| Listen to reason (SD240011.11) | Cpt. Olivera takes control of the Bridge. |
| Rave in the Transporter Room (SD240011.13) | Lt. Jones and Ensign Savel lead a team to retake Transporter Room One. |
| Not Just a Doctor (SD240011.16) | 2nd Lt. Thevn plays Explosive Santa in Sickbay. |
| Showdown (SD240011.18) | The Bridge is retaken. |
| An Unlikely Conversation pt2 (SD240011.19) | Lt. Jones gets a new perspective when meeting an old friend in the light. |
| Light Burn You (SD240011.21) | Chief Yellir regains control of Main Engineering. |
| Running From Responsibilities (SD240011.23) | Cdr. Adea finishes surgery and takes a well-deserved rest, while his counterpart seizes his freedom by force. |
| We've Got the Package (SD240011.24) | Lt.Cdr. Dakora and Ensign Chevalier retrieve the Prismagons from a stunned Colonel MacKenzie. |
| Send Them Home (SD240011.29) | The Artemis is cleared of Desdemonan boarders, and Captain MacKenzie says 'good riddance'. |
MSPCs and NPC Mentions
| Character name | Rank equivalent[8] | Duty post | Notes |
|---|---|---|---|
| Addison MacKenzie | Colonel | Commanding officer | Counterpart of Addison MacKenzie |
| Didrik Stennes | Major | Acting executive officer | Simmed by Yogan Yalu. Player on LoA partway through. |
| Genkos Adea | Lieutenant Colonel | Chief physician | Counterpart of Genkos Adea. MIA - Escaped in Starfleet Shuttle. |
| Victor 'Vik' Olivera | Captain | Tactician | Counterpart of Vitor Silveira |
| Luana Yellir | Captain | Engineer, cyber-warfare specialist | Counterpart of Hallia Yellir |
| Flint Johnathan Kader | 2nd Lieutenant | Navigator | Counterpart of Flint Kader |
| Savel | 2nd Lieutenant | Special warfare operator | Counterpart of Savel |
| Gila Thevn | 2nd Lieutenant | Physician | Counterpart of Gila Sadar |
| Kuva | 2nd Lieutenant | Liaison officer to the Unified Resistance | Counterpart of Kuva. Player AWOL partyway through. |
| Jovenan | 1st Lieutenant | Science officer | Counterpart of Jovenan. Deceased. |
| Harry Sato | 1st Lieutenant | Counselor | Counterpart of Hiro Jones. Deceased. |
| J | 2nd Lieutenant | Shock Troop | Counterpart of Jaseb Chevalier. Deceased. |
| Ares 'Romeo' Dakora | Major | Air group commander | Counterpart of Talos Dakora. Deceased. |
- Mentioned NPCs:
- Resistance Cell Leader Sorev - Kuva's father
- Cyberware Specialist Rasa - Lux's littermate
- Colonel Thera MGia - Commanding officer of the CIC Othello
- Vanda MGia - The young daughter of Thera and Victor
- Shock Troop M'Bel - Lux's littermate
- Special Ops Della - Lux's littermate
- Petty Officer 3rd Class Xandeus Filistrien - PNPC Signals Analyst on the USS Artemis'
- Ensign Kawarda - PNPC Scientist on the USS Artemis'
- Crewman 3rd Class Jozial Renirs - PNPC Technician on the USS Artemis'
FNS Headlines

*  Stardate 240011.30: Intrigue in the Borderlands: USS Artemis-A encounters vessel from an alternate reality.
*  Stardate 240012.30: Realities collide: USS Artemis fends off assault from alternate universe counterparts.
Fun facts
- Many things in the Shint War universe appear to be named after and incorporate themes which appear in the works of William Shakespeare.
References
- ↑ Hot Yogan, Major Yogan Yannick, SD 240009.09
- ↑ Grade-A Group Projects, Cpt. Luana Yellir, SD 240009.23
- ↑ Ragnarok, Cpt. Victor Olivera, SD 240009.22
- ↑ Cauchemar, Major Didrik Stennes, SD 240009.23
- ↑ Plan of Action, Colonel Addison MacKenzie, SD 240010.16
- ↑ Last Ditch Attempt, Lt. Col. Adea, SD 240011.09
- ↑ Look at Me, I am the Doctor Now, Ensign Savel, SD 240011.14
- ↑ The Interstellar Commonwealth uses a rank structure similar to that of the prime universe Starfleet Marine Corps. Not all crew members are graduates of the Commonwealth Fleet Academy; some hold field commissions or provisional ranks.