Template:Infobox Wiki/doc
This template can be used to create an infobox with "traditional Wiki style" that has been used in several templates in 118Wiki. It is best used as a basis for other infobox templates, but it can also be used to create custom one-time infoboxes as well.
There are various different infobox templates for specific purposes using this or similar style. These specific templates should be used instead of this one. Note that there are other styles of infoboxes in 118Wiki as well, for example Template:LCARS-Navbar. See Category:Infobox templates for various different infoboxes.
Usage
This template is best used together with Template:Infobox row and Template:End Table. Both these templates can be replaced, but these instructions presume they are used.
Simple infobox:
{{Infobox Wiki|name=Main Title}}
{{Infobox row|type=subheader|Subsection Title}}
{{Infobox row|title=Item Title|Item Value}}
{{End Table}}
Full use (in simple infobox):
{{Infobox Wiki|name=Main Title|image=Image|image text=Image Text|header color=Header Color|header text color=Header Text Color}}
{{Infobox row|type=subheader|color=Subsection Header Color|text color=Subsection Header Text Color|weight=Subsection Header Font Bolding Option|align=Subsection Header Alignment|style=Subsection Header Other Styling Options|Subsection Title}}
{{Infobox row|title=Item Title|style=Item Row Styling Options|Item Value}}
{{End Table}}
Examples
Creating infobox template
The templates can be used to create other templates. In such case, create a new template page for your template, hardcode the options you don't want the end user to change and place a new parameter in the value as a value for what you want them to input.
For example, here's the code for Template:Sector as of November 2023.
{{Infobox Wiki
|image={{#if:{{{image|}}}|[[File:{{{image|}}}|{{{image size|210px}}}]]}}|image text={{{image text|}}}|header color=#104E8B|header text color=white|name={{{name|{{PAGENAME}}}}}}}
{{Infobox row|type=subheader|color=#bcd|Astrological}}
{{Infobox row|title=Region|{{{region|}}}}}
{{Infobox row|title=Systems|{{{systems|}}}}}
{{Infobox row|title=Other planets|{{{otherplanets|}}}}}
{{Infobox row|title=Space stations|{{{stations|}}}}}
{{Infobox row|title=Asteroids|{{{asteroids|}}}}}
{{Infobox row|title=Comets|{{{comets|}}}}}
{{Infobox row|title=Nebulae|{{{nebulae|}}}}}
{{Infobox row|title=Other objects|{{{other|}}}}}
{{Infobox row|title=Trade routes|{{{routes|}}}}}
{{Infobox row|type=subheader|color=#bcd|Societal}}
{{Infobox row|title=Native species|{{{species|}}}}}
{{Infobox row|title=Sector capital|{{{capital|}}}}}
{{Infobox row|title=Affiliation|{{{affiliation|}}}}}
{{Infobox row|type=subheader|color=#bcd|Sector battles}}
{{Infobox row|title=Notable Battles|{{{battles|}}}}}
{{End Table}}
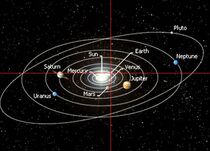
 Sol system, located in Sector 001 | |
| Sector 001 | |
|---|---|
| Astronomical | |
| Systems | Sol system |
| Space stations | Starbase 0834 Starbase 4077 |
| Societal | |
| Native species | Human |
| Sector capital | Earth |
| Affiliation | Federation |
| Sector battles | |
| Notable Battles | Battle of Sector 001 |
Here, the creator has set the subheaders and the titles for individual rows. The end user may input the values for each item. The items without a value simply do not appear. The use of Template:Sector is now very easy for the end user. An example of end user's code is below, and the result is on the right.
{{Sector
| image = Sol System.jpg
| image text = Sol system, located in Sector 001
| name = Sector 001
| systems = Sol system
| stations = Starbase 0834 <br> Starbase 4077
| species = [[Human]]
| capital = [[Earth]]
| affiliation = [[United Federation of Planets|Federation]]
| battles = Battle of Sector 001
}}