Triumphant Deck-by-Deck Layout
Jump to navigation
Jump to search
| USS Triumphant | ||
|---|---|---|
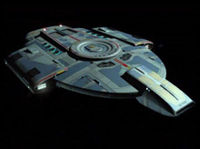 SUPPORT VESSEL | ||
| ||

Deck 1
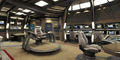
Bridge

Bridge from the rear


- Command Bridge
- Transport Room One
- Deuterium Tanks
- Plasma Vents
- CO's Quarters
- CO's Ready Room
- XO's Quarters, Office
- Pulse Phaser Cannon
- Upper Engineering
- Sensor Palette
- Officer's Quarters A-J (quarters for 4 medical officers and the 6 chiefs, tactical, security, helm, operations, engineering and science)
- Operations Officer
- Phaser Charging Cells
Deck 2

Engineering

Shuttlebay


- 8 Plasma Vents
- Main Impulse Engines (Upper Level)
- Main Engineering
- Engineering Lab/Office
- Dual Computer Core
- Targeting Sensors
- Mess Hall
- Med Lab/Office
- Sickbay
- Science Lab/Office
- Astrometrics Lab
- Transporter Room
- Warhead Control Room
- Crew Quarters
- Warp Coils
- Brig
- Security Officer
- Armoury
- Shuttlebay (Upper Level)
- Guest Quarters (2)
Deck 3
- Escape Pods K-P
- Main Impulse Engines (Lower Level)
- Dual Computer Core
- Warp Coils
- Aft Torpedo Magazine
- Fore Torpedo Magazine
- Torpedo Launcher
- Shuttle Bay 1 and 2
- Cargo Bay Pad
- Bay Door Mechanism
- Antimatter Storage
- Cargo Bay 1-4
- Cargo Transporter
- Main Shuttle Bay
- Main Airlocks
Deck 4
- Pulse Phaser Cannon
- Warp Coils
- Torpedo Launchers
- Cargo Bay Pad
- Bay Door Mechanism
- Holodeck (converted from 2 multipurpose rooms)
- Ventral Torpedo Magazine
- Ventral Torpedo Launcher
- Landing Legs
- Lower Sensors
- Navigational Deflector
- Counsellor's Office (formerly a storeroom)
All Decks
- Escape pods