Tiger-A Independence Flight

WARNING: The Following is a work-in-progress and dependent on approval.
The Independence Flight or, more formally, The USS Tiger-A # Assault Wing (Independence Flight), is a tactical assault force of 12 FA-150 Fast Attack Space Superiority Gunships named in honour of the USS Independence-A.
Command and Organization
The Independence Flight is commanded by the CAG (Commander - Air Group) Lt. JG Brayden Jorey. The CAG is supported by the DCAG (Deputy Commander - Air Group) Ensign John Rysegard and the OAG (Operations - Air Group) Ensign Ryan Hobbs. The Air Group is made up of Starfleet Officers who have agreed to do double-duty between their primary department (Security, Engineering, etc.) and the Independence Flight.
The Independence Flight is made up of three squadrons: Freedom Squadron (Lead by the CAG), Justice Squadron (Lead by the DCAG), and Opportunity Squadron (Lead by the Senior Pilot). Each squadron is made up of two flights (pairs of fighters) for a total of four fighters per squadron. Each fighter is made up of a Pilot and a Tactical Systems Operator (TSO) in the second seat. However, in an emergency situation a fighter can be manned by just a pilot. On the USS Tiger, maintenance and engineering crew are not assigned to a specific fighter, as is normally the case, but rather share responsibility for all fighters in order to conserve resources. When the Independence Flight is deployed the OAG reports to the bridge (often taking the Helm position) to coordinate the action with the Tiger.
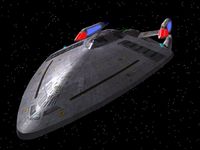
The FA-150 Fast Attack Space Superiority Gunship (Maul)
Originally intended as a heavy assault version of the earlier FA-120 space superiority fighter, the FA-150 has become the lander, 'drop ship' and assault gunship of choice for the marine corps. The fleet has also commissioned many of these for planetary defense. A wing of 'Mauls' will easily handle a small capital ship without breaking a sweat, pose a capable match for a medium capital ship, and put up a good fight even against a large one. Mauls are still not as common as other tactical craft. The SFDI has also ordered them for landing operations. Produced in the Iwaix Fleet yards, Vulcan sector.
- Type: Medium, short range Warp gunship
- Active Service Date: 2380. Successor to FA-120 series.
- Accommodation: Pilot & Co-Pilot; Eight Additional Marines/Passengers
- Power: 2x 22k Millicochrane Warp Engines, 20x DeFl 9200 Microfusion RCS Thrusters & 2x 10k Impulse Engines (Port Aft, Starboard Aft for turning Velocity)
- Dimensions: Length 13m | Beam 7m | Height 4m
- Mass: 9.2m tonnes
- Performance: Warp 9.4 for 36 hours
Armament
- 4x Type-XV Phaser Cannons;
A total of four pulse phaser cannon assemblies are located in forward-facing locations. Due to the ship's extreme maneuverability, yard engineers deemed it unnecessary to mount aft-facing cannons onboard vessels of this class. Pulse phaser cannons store up their charge between 1.7 and 2.1 nanoseconds, resulting in an energy pulse more powerful then standard Type-X phaser emitters. Rapid fire of multiple bursts is accomplished through a direct EPS shunt from the warp reactor. If situations warrant, power can be routed from the impulse engines through a secondary plasma tap. For maximum effectiveness, all four cannons fire several bursts at the same time, resulting in a large amount of energy impacting a relatively small location. This tactic has been proven to pierce the shields of threat vessels without having to collapse the entire grid.
- 2x Type-VIII Phaser Emitters (stern), for a total phaser output 5,600 Terra-watts;
Benefiting from computer assisted targeting, the phaser emitter is generally configured to allow for the phaser system to release the beam in almost any direction. This allows the weapon to track and fire at moving targets without the need to physically move the weapon system itself with the target it is engaging. This allows a ship's primary emitter (whether singly or as part of a bank or array) to successfully engage small, fast moving targets such as asteroids, auxillary craft, or fighters.
The type VIII is the phaser armament of choice for most of Starfleet's small to medium sized ships. While varying degrees of power and capabilities can be found from class to class - even from ship to ship - the general Type VIII operating principles remain the same and any deviations in any regard are usually negligible. This phaser type provides excellent offensive and defensive capabilities for many ship classes that, due to their size, require significant quantities of internal volume for other operations which would otherwise be consumed by larger phaser weaponry.
- 2x bow-mounted Micro-Quantum torpedo launchers.
Based on the same principle as the quantum torpedo, the micro quantum torpedo is 14cm in length. Its small size allows it to be fired from a variety of smaller craft, such as fighters, shuttles and runabouts. Although it is capable of doing more damage than its photon counterpart, it is still limited in damage capability.
Shields
Type-10 generators capable of deflecting 2.4 x 10 to the 5th kW. Utilizing cutting edge technology in space-frame design the FA-150 is capable of high velocity turns up to and exceeding a massive 41g without compromising the enhanced Structural Integrity Field with a single Duranium-Tritanium Hull with a high-level SIF and 2cm of ablative armor.
Sensors
Standard shuttle sensor package with "TAC-LINK" secure channel to host-starship (can accept tactical and other data from host Starship's CIC on a secure subspace short-range channel).
Pilots and TSO's
Pilot and TSO Responsibilities
Fighter Pilot: Fighter Pilots are trained in aerodynamics, support craft and fighter engines, flight systems, meteorology, navigation, plus flight rules and regulations. They also receive training in maintenance and supervision of ground crew personel. They are trained in combat fighter tactics in space as well as atmospheres. They all begin training with runabouts, shuttles and transports so are qualified on all types before graduation.
Tactical Systems Operator (TSO): The Tactical Systems Operator (or TSO) is responsible for operating all offensive and defensive systems in fighters which have two operators. This frees the pilot to handle only the operation of the aerospacecraft. Most TSOs are also trained as pilots, for circumstances when the main pilot of the fighter is incapacitated or killed but the craft is still servicable. The TSO answers to the Flight Leader, and is generally subordinate to the Fighter Pilot operating his/her craft.
Tactical Assaut Craft Guide
I would suggest that everyone begin by having a look at this Guide for Fighter Pilots. It helps to explain quite a bit about fighter operations. Most important is to make sure you read the section on Tactical Flight Operations Are Like.
The Basics: BFM
Basic Fighter Manoeuvres (BFM)
There are three basic situations in air combat maneuvering requiring BFM to convert to a favourable result, which are neutral, offensive, and defensive. Most relative maneuvers can be grouped into one of these three categories: Neutral, Offensive and Defensive. The following list of BFM is intended as an introduction and is not an exhaustive list.
Neutral
Neutral positions generally occur when both opponents spot each other at the same time. Neither the pilot nor the opponent have the advantage of surprise. Neither has the ability to point the nose of their aircraft at the opponent with sufficient range to employ forward firing ordnance (missiles/guns) prior to the opponent presenting a threat of a similar manner. Each is focused on converting to an offensive situation while forcing their opponent into a defensive.
Neutral BFM
Combat Spread: The combat spread is the most basic of maneuvers used prior to engagement. A pair of attacking aircraft will separate. The fighter with the lower altitude becomes the defender, while the wingman flies above in "the perch" position. The defender will then attempt to lure their opponents into a good position to be attacked by the wingman.
Scissors: The scissors are a series of turn reversals and flightpath overshoots intended to slow the relative forward motion (downrange travel) of the aircraft in an attempt to either force a dangerous overshoot, on the part of the defender, or prevent a dangerous overshoot on the attacker's part. The defender's goal is to stay out of phase with the attacker, trying to prevent a guns solution, while the attacker tries to get in phase with the defender. The advantage usually goes to the more maneuverable aircraft. There are two types of scissor maneuvers, called flat scissors and rolling scissors.
Flat scissors: Flat scissors, also called horizontal scissors, usually occur after a low speed overshoot in a horizontal direction. The defender reverses the turn, attempting to force the attacker to fly out in front and to spoil aim. The attacker then reverses, trying to remain behind the defender, and the two aircraft begin a weaving flight pattern.
Rolling scissors: Rolling scissors, also called vertical scissors, tend to happen after a high speed overshoot from above. The defender reverses into a vertical climb and into a barrel roll over the top, forcing the attacker to attempt to follow. The advantage lies in the aircraft that can pull its nose through the top or bottom of the turn faster.
Offensive
An offensive position generally occurs when the pilot gets sight of the opponent first. With the advantage of surprise, the pilot can maneuver into a better position to attack the opponent, making it more difficult for the enemy to evade the attack. Common tactics include increasing altitude and attempting to place the fighter directly between the sun and the opponent. This helps put the pilot in a dominant position, primarily concerned with prosecuting their advantage for a kill. An offensive position is generally defined as the ability to get above or behind the enemy. The pilot is able to create an energy advantage, providing the ability to swoop down on the opponent and spray the area with bullets while using the speed to climb back to a safe altitude. The attacker also has an orientation-related advantage, being able to press the attack while avoiding the enemy's weapons.
Pursuit Curves
Lead Pursuit: occurs when the nose of the attacker points ahead of the defender. This is done to close into an opponent, especially a faster opponent. Lead pursuit is used during gun attacks, because the fast motion of combat requires that the aircraft's cannons be aimed at a point in space ahead of the defender, where the enemy will be when the weapons fire will arrive.
Pure Pursuit: occurs when the attacker's nose points directly at the defender. Pure Pursuit is used to close on an opponent, however the rate of closure is far slower than Lead Pursuit. Pure pursuit is best used to secure a quick lock for torpedoes.
Lag Pursuit: occurs when the attacker's nose points behind the defender. Lag pursuit is used to stop or reverse closure rate, while allowing the attacker to maintain or increase forward separation.
Offensive BFM
Barrel roll attack: The counter to a break is often a displacement roll called a barrel roll attack. A barrel roll consists of performing a roll and a loop, completing both at the same time. The result is a helical roll around a straight flight path. The barrel roll attack uses a much tighter loop than the roll, completing a full loop while only executing 3/4 of a roll. The result is a virtual 90 degree turn, using all three dimensions, in the direction opposite of the roll. Rolling away from the defender's break, the attacker completes the roll with the aircraft's nose pointed in the direction of the defender's travel.
High-side guns pass: If the attacker has a significant altitude advantage, a high-side guns pass is usually prudent. Sometimes called a "swoop," plus a variety of other names, it consists of a powered dive toward the rear quarter of a lower flying opponent. Shooting with the cannons in a single, high-speed pass, the attacker then disengaged from the fight in a zoom climb back to a safe altitude, restoring the potential energy. This allows the attacker to set up another attack and dive again. Surprise is often a key element in this type of attack, and the attackers will often find a method of stealth, stalking their opponents until a good opportunity is presented. A high-side guns pass is a very effective tactic against a more maneuverable opponent, where the turning battle of a dogfight is best avoided.
Immelmann Turn: An Immelmann trades airspeed for altitude during a 180 degree change in direction. The aircraft performs the first half of a loop, and when completely inverted, rolls to the upright position. The Immelmann is a good offensive maneuver for setting up a high-side guns pass against a lower altitude, slow moving opponent, going in an opposite direction. However, an Immelmann is a poor defensive maneuver, turning the defender into a slow moving target.
Split-s: The opposite of an Immelmann is the Split-S. This maneuver consists of rolling inverted and pulling back on the stick, diving the aircraft into a half loop, which changes the aircraft's direction 180 degrees. It is most often used to set up a high-side guns pass against a lower but fast moving opponent that is traveling in the opposite direction. Also, the split-s is sometimes used as a disengagement tactic.
Pitchback: A pitchback is an Immelmann that is executed in some plane other than the vertical. Basically just a pitch turn, the fighter will be at some angle of bank before performing the half loop and roll. A pitchback is harder for an adversary to track.
Defensive
A defensive position usually occurs when the pilot spots the attacker late. Usually below or ahead of the opponent, the pilot is in a weak position, primarily concerned with denying a shot to the opponent and converting to a neutral position. The secondary goal is either to escape or to achieve a dominant position. If the attacker is at an energy disadvantage, the defender will likely use the speed to disengage, but, if the attacker is moving much faster, the defender will usually maneuver in order to force a dangerous overshoot. A dangerous overshoot happens when an attacker flies out in front of the defender, causing their roles to be reversed.
Defensive BMI
Defensive Split: A pair of fighters encountering one or two attackers will often use a defensive split. The maneuver consists of both defenders making turns in opposite directions, forcing the attackers to follow only one aircraft. This allows the other defender to circle around, and maneuver behind the attackers.
Break: Spotting an attacker approaching from behind, the defender will usually break. The maneuver consists of turning sharply across the attacker's flight path. The defender is exposed to the attacker's guns for only a brief instant. The maneuver works well because the slower moving defender has a smaller turn radius and bigger angular velocity, and a target with a high crossing speed (where the bearing to the target is changing rapidly) is very difficult to shoot. This can also help to force the attacker to overshoot.
Lag displacement roll: A lag displacement roll, also called a "lag roll", is a maneuver used to reduce the angle off tail by bringing the attacker from lead pursuit to pure, or even lag pursuit. The maneuver is performed by rolling up and away from the turn, then, when the aircraft's lift vector is aligned with the defender, pulling back on the stick, bringing the fighter back into the turn. This maneuver helps prevent an overshoot caused by the high AOT of lead pursuit, and can also be used to increase the distance between aircraft.
Guns Defence: Guns defence maneuvering, or "guns-D," is the last resort for a defender that fails to outmaneuver the attacker. Guns-D is a series of random changes in the defenders flight path, intended to spoil the attacker's aim by presenting a constantly shifting target, and, hopefully, to maneuver out of the bullet stream. It consists of arbitrary speed changes, yaws, skids, pitch-ups, and rolls, often referred to as "jinking," and is very effective at preventing the attacker from achieving a suitable guns solution. However, guns-D maneuvering still leaves the defender susceptible to stray bullets and "lucky shot" hits, and does little to improve the relative positional situation. Thus, it is only employed as a last-ditch defensive effort when nothing else works.
Independence Flight Communication
Communications between fighters can be broken up into two types: Directive Comm and Descriptive Comm
Directive comm: used to immediately drive the section or an individual fighter in order to react to a threat or other situation. It is used to avoid a defensive situation, increase survivability, deconflict, or drive flow. Time is short, so be clear and concise.
Descriptive comm: used to provide amplifying information. It can be used to describe the location of the bandit or a wingman. It can also be used to deconflict the fighters, or to describe what another fighter is doing to build the picture. Descriptive comm is not required if you are describing something that is apparent to the other fighter. Use it to fill in the SA gaps or bring a low SA fighter back into the mix.
Before any tactics can be discussed, the fighters must be able to communicate effectively. Clear, concise comm is paramount in a dynamic environment with limited radio time. The section should strive to use proper comm to achieve this goal. As always, prioritize directive comm over descriptive comm, with any fill-ins at the end. Combine directive and descriptive comm to build the whole picture. Avoid running commentaries. Update the fight as it changes.
Short-Hand Comm
Anchored: turning engagement at a specified location. Ex. "Freedom 2 anchored 19 & 38 for 1000."(Meaning Bearing 019, mark 038, 1000 metres away))
Bandits: Enemy craft. Also referred to as Bogeys.
Blind: no visual or sensor reference with friendly aircraft.
Boomers: Micro-Torpedoes.
Break (left/right): perform an immediate mximum performance turn in the direction indicated.
Break (left/right) 90: same as break, however limit the turn to 90 degrees of heading change.
Defensive: fighter is under attack, maneuvering defensively. Ex. "Justice 2 defensive 128 & 49 for 700."
Engaged: fighter is in an offensive or neutral position.
Free: fighter is neither defensive or engaged.
Jockey: A Pilot.
Kill: a fighter call to indicate kill criteria (disable system, destroy, immobilize, etc.) has been fulfilled.
Merged: friendlies and targets have come together.
No Joy: aircrew does not have visual or sensor data with non-friendly aircraft.
Padlocked: aircrew cannot take eyes or sensors off a target without risk of losing tally.
Posit: request for friendly position. Ex. "Opportunity 2 Posit."
Set: set (or have set) a particular speed. Ex. "Set half impulse."
Status: request for an individual's tactical situation and position.
Tally: sighting of a non-friendly ship.
Unable: cannot comply as requested or directed.
Visual: sighting of a friendly aircraft.
Section Engaged Manouvering
Tactical fighter employment has continued to evolve due to advanced weapons technology and a deeper understanding of threat capabilities. Despite these changes, the fact remains that you may find yourself going to the merge with an enemy aircraft. Circumstances leading to this include an electronic attack (EA) environment, a visual identification requirement, an unobserved entry to delouse another fighter, or Beyond Visual Range (BVR) weapons that do not guide and/or fuse on the target. In any case, if a section of fighters finds themselves turning at the merge, they are executing engaged maneuvering. The fighters’ ability to gain tallies, maneuver to achieve a timely kill, and then continue to execute their primary mission is driven by their ability to employ engaged maneuvering fundamentals.
As the name implies, section engaged maneuvering (SEM) employs from the basic fighting element – the section. The most basic SEM environment is two fighters against one adversary, or 2v1. SEM is not, however, limited to 2v1. In the fleet, 2v2 engagements or 2v unknown engagements in the visual arena will be encountered. Understanding the basic principles behind 2v1 will allow you to develop your capabilities in more complex situations.
SEM is one of the most challenging missions for aircrew. It requires you to track multiple aircraft and make timely decisions while employing your aircraft to the edge of its capabilities. To be successful you must be able to apply your 1v1 BFM skills. Your training command experience will be a building block approach, giving you the foundation to be successful in future missions and fleet experiences.
Formation
The fighters have two primary formations to choose from: Defensive Combat Spread (DCS) and Offensive Combat Spread (OCS). OCS provides better isolation of each aircraft, but it reduces the ability and effectiveness of the fighters to visually clear the airspace around each other. The fighters will employ out of DCS because it allows maximum visual mutual support. DCS is the best formation to use when “defensive” in nature and expecting to react to threats visually. The wingman must fly a disciplined formation, striving to be directly abeam lead, to maximize visual mutual support.
Environment
An understanding of the environment and how it affects your event is important. On a hazy day, a tally may be hard to achieve until the bandit is inside of three nautical miles. This may result in only one of the two fighters, likely the closest fighter, being “tally” while the fighter on the far side of the formation remains “no joy” due to environmentals. Evaluating the environment and compensating for it is an important factor.
Sensors
Tactical Assault Craft include a multitude of sensors and systems to enhance aircrew performance. These sensors can be overwhelming at times with almost too much information being delivered. A sound visual lookout cannot be sacrificed. By now you should have a good eyeball cal from your BFM sorties. It is now time to take your calibrated eyeballs and use them to max perform your aircraft in order to be as lethal as possible.
Communication
Lastly, before any tactics can be discussed, the fighters must be able to communicate effectively. Clear, concise comm is paramount in a dynamic environment with limited radio time. The section should strive to use proper comm to achieve this goal. As always, prioritize directive comm over descriptive comm, with any fill-ins at the end.
SEM Fundamentals
1 Kill the adversary. 2 Avoid becoming defensive. 3 Fly your best 1v1 BFM. 4 Establish Engaged roles/responsibilities/communication.
In order to be successful at SEM, the fighters need to coordinate their attacks. Effective coordination and proper application of the SEM fundamentals requires both fighters to be tally/visual. You must strive to track both aircraft while flying your craft to the limit of its capabilities. SEM is more than 1v1 plus 1. It is two fighters actively working together to achieve a quick kill. The fighters will be faced with multiple 1v1 BFM gameplan options. You must learn how to adapt your 1v1 BFM decisions based on the section’s current situation or the other fighter’s location. Do not however, do anything contrary to sound 1v1 BFM simply because you are working in section. If either fighter’s best 1v1 breaks down, the bandit will be able to gain the advantage and their job gets much easier once the fighters begin to make mistakes or commit BFM errors.
Independence Flight Mission Types and Objectives
There are several mission types undertaken by the USS Tiger-A # Tactical Assault Wing (Independence Flight).
Fighter Superiority
Secure and Control any assigned sector of space or airspace by establishing a perimeter of fighters capable of engaging and possibly destroying any attempted intrusion by intruders spacecraft or aerospace craft. Aerospace Superiority fighters require weapon capacity able to deal with an intruder at least till support can arrive, Excellent maneuverability and enough speed to cover the assigned sector, and an ability to absorb damage.
Typical Superiority missions are:
Combat Patrols: Which is to provide a protective patrol for either a carrier or base. This extends sensor range for the ship/or/base and provides a layer of defence. In high threat areas layers of patrols can be assigned extending outward with Ready-Alert-Flights on call for additional support.
Interception: If any non-authorized craft attempt to enter a patrolled or designated sector then a response is called for. If no patrol is active then a ready-alert-unit is launched to close and make contact with the Intruder.
Control and Surveillance
This mission involves tracking all craft in a given sector. To include coordinating friendly forces and maintaining a vector, course, and position of all other craft. Determining a threat level identifier on any non-aligned craft and denying them access.
Fighter Ground Support
The use of assets to attack hostile ground forces both tactical and strategical. To include forces already in contact with friendly troops, or on the point of engaging them. As well as designated targets of opportunity. Air Support requires good communication with the ground forces they are supporting, Positive target identification, weapons load-out appropriate to the mission, ability to engage multiple ground targets, and in sectors heavily defended by an escort.
An added problem for these missions is weather and gravity. These factors need to be programmed into the Fighter's combat maneuvering system before any in atmosphere strike mission. It can be done by the pilot on the 'fly' however.
Courier Missions
These are missions to deliver passengers or light cargo to ships on missions. Personnel transfers, critical parts delivery, or for medical emergencies are just some of the reasons for these missions. Due to the navigational training and long solo flights many fighter pilots seek these assignments to enhance their navigational skills. These are often contested assignments as flights seek the training experience as well.
Electronic Signals Intelligence (ELINT)
ELINT describes any of several types of surveillance missions that involve craft in position near enemy lines (or covertly behind enemy lines) conducting passive reconnaissance. This usually involves intercepting enemy communications and/or transmissions/emissions (hence the name). Although, it can often mean simply monitoring enemy troop or craft movements.
Escort Missions
In unfriendly area where threats are expected fighters are often assigned to escort larger auxiliary craft, shuttles, or even land convoys. This duty is to ensure the escorted craft depart, travel, and arrive from one location to their destination.
Typical Escort missions include:
Escorting a strike mission, when fighters carry ordinance they are almost always less maneuverable and therefore at a disadvantage to other fighters or defensive measures. An escort fighter unit is used to ensure the Strike craft reach their target with their heavy payload intact.
Escorting VIPs or high priority cargoes such as medical supplies or military equipment/supplies. When they travel in auxiallary craft and when threats are suspected to exist.
Military Airlift
When fighters move personnel and supplies to any area in the most efficient way possible. Craft require great cargo capacity and long range. These craft usually have crews of more than one, and may even have duplicate crews to relieve each other on long flights.
Reconnaisance
Recon is similar to ELINT, but is more active. This involves craft overflying an area and collecting active sensor data. This data is then fed to intelligence analysts who can then update enemy force strength estimates and response scenarios.
Search and Rescue (SAR)
These missions are a coordinated effort to locate and rescue those lost or in trouble. Space or on a planet these are often dangerous missions and are a high priority once authorized. If at all possible a craft with transporter capability is assigned and someone on the team should have medical training.
Strike Missions
Strike missions are Fighter-to-ship attacks. Used mostly as a decoy as Fighters have a low survivability against the heavier weapons of any full-sized Starship. At the same time even a flight of strike craft properly coordinated can overwhelm a ships defensive systems. Fighters such as the Maul carry enough of a payload to deliver a devastating attack against most ships. Because of their maneuverability and overall nimbleness pin-point attacks can cripple or destroy a target, so this is a viable offensive weapon.