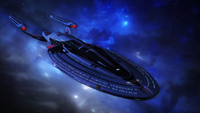
Ragnarok (USS Thor)
| USS Thor | ||
|---|---|---|
 INACTIVE STATUS | ||
| ||

The Federation loses communication with a floating scientific research outpost located on an ocean world in the Gamma Quadrant. The Thor is tasked to investigate and assist as necessary. It quickly becomes clear that pirates have attacked the station, however the situation quickly spirals out of control...
Mission Summary
Prologue
The Okaea Research Outpost floats in the middle of the Perrini Ocean on the planet Okaea with the scientific mission of deep water scans. Crewed almost entirely by civilian scientists, they are wholly unprepared for the pirate raid that descends upon them. Blinded by the planet's atmosphere which blocks sensors and transporters, the scientists have little warning to the violence looming. Two scientists start to look into a missing sample when blaster fire is heard outside their lab. Renavook Sombi, lead researcher, quickly calls for the computer to lock the doors and he and his assistant, Adodar Broha, attempt to get out a distress signal. Pirates, however, blast their way in and destroy the console along with the hopes of reaching someone and take the researchers hostage.
Act 1
After contact with the Okaea Research Outpost is cut off, Starfleet sends the crew of the USS Thor to investigate. Commodore Kells personally leads an away team on a shuttle to the surface, an abundance of an isotope making transporter use risky. Major Greaves is put into command of the Thor and is joined by Commander Brodie, Ensign Kessler and Ensign Ulasso on the bridge. In the science lab, Lieutenant Katsim joins forces with Ensign Basilia and Lieutenant Reid to see if they can find out what the researchers were working on and whether or not it was the cause of the sudden cut-off of communication.
Greaves is concerned about possible trouble as well as the inability to transport due to the compound in the atmosphere, and calls for the bridge crew to try and find a way around it. Brodie suggests searching the archives in order to better map out some areas on the planet, but comments that the away team may just have to navigate visually. Greaves asks Ulasso if they could drop lower into the orbit or possibly the upper atmosphere of the planet. At Brodie's suggestion, they go to yellow alert and prepare to descend. Ulasso deftly manuevres the ship and notices a strange force causing resistance and reduces the speed to prevent undue stress on the vessel. Kessler recommends launching a class three planetary probe to help assist gathering data and perhaps find a way to cut through the interference. Unfortunately, the shields lighting up distort the view.
To allow a clearer visual, power from the shields is transferred to the forward deflectors to protect the ship from anything that might come at it while hovering, but allow them to see below far more clearly. The crew gets frustrated at the situation and Brodie tries to encourage them by offering a positive outlook. With the probe launched, Ulasso sends relevant information to the science team to coordinate efforts. Ultimately, they decide to pull back and return to the standard orbit. Kessler manages to determine the presence of another ship powering up near the research station. A sudden orange hue that looks like an explosion catches their attention, and they suspect the probe has been destroyed. Due to the interference, communication and sensors are limited, so they are unable to determine if the probe's destruction was due to some sort of attack, or an accident due to the nature of the atmosphere. Greaves suggests sending out several probes in different directions to assist. Brodie concurs, and suggests that the probes also monitor each other to determine whether the first was simply an accident or something more.
In the planetary science lab, Katsim is joined by Corelli, Kel, and Reid. With the abundance of Krypton 78 in the atmosphere, the isotope makes communications more difficult, and transportation risky. The group seeks to find a way around that and try to connect to the database of the research station. Corelli suggests employing a laser to attempt to use the atmospheric particles to their advantage. A gas plasma beam of sufficient energy could react with the isotope and thus form a laser though he did warn that it would be weak, but indicated that it could be used to program the computer except data transmission even if only in text and the ship would have to remain in low orbit.
After some confusion about their tasks, Katsim tells Corelli to work with Reid and initiate his plan in an attempt to get data from the base while she and Kel search through the last known information from the research outpost to see if there are any indications of anything that might have led to the sudden cutoff. The laser connection is established and data starts to transfer, though slowly. In an effort to get visuals, the team hijack the telescopes on the targeting array and spy an unknown vessel. They alert the bridge, then release control back to the helm.
Kells along with Lieutenant Richards, Ensign Basillia and Ensign Toz take the USS Ra, one of Thor’s shuttles, down to the surface and they theorise what could have happened to the researchers to prevent them from communicating, including illness as a possibility. As they descend, they begin sending hails at regular intervals in the hopes of re-establishing communications. The atmosphere makes scans difficult, but as they descend, there’s an indication that there might be another vessel. Then, further readings reveal more inhabitants than there should be. Toz points out there have been raiders and pirates who seek out scientific secrets to steal and sell. Out of concern for his crew, Kells notes there’s time to abort the trip. Basilia insists it is their duty to help. The group go down and Richards recommends the commodore remain in the shuttle for his safety, but in the end, all four investigate.
As Kells and his team members leave the shuttle, life signs are registered. Basilica notes that the security system has been deactivated. A moment later, they are face to face with a pirate by the name of Nelve and his associate, Ru. To prevent any bloodshed, the Starfleet officers give up their weapons. Basilia tries to help the civilians by indicating that the officers would be much more valuable, and thus the original captives should be released. The pirates laugh off the offer. Kells gives a signal, and the officers try to fight back, but the pirates gain the upper hand. Tossing the officers into the lab and locking the doors, they start to lead the researchers back to the shuttle, but then Doctor Renavoo Sombi mentions what the Pirates *didn’t* get. The ruse works and they return to the lab, then the pirates demand the researchers show them what it is they found. Sombi complies, but the image is fuzzy, which makes the pirates think that the item on the bottom of the ocean floor is a downed Ferengi ship. Though Sombi knows the truth, he does not tell them and leads them on, hoping to give more time for the rest of the Starfleet Officers time to help rescue the away team - and hopefully them as well!
Back on the Thor, the crew sends out probes, when suddenly something strikes the ship. Chaos erupts, panels short circuit, and the crew find themselves tossed about like rag dolls. With injury and damage reports coming in, the Thor starts to fall from the sky. Greaves calls for everyone to abandon ship and everyone makes their way to escape pods while he remains on the bridge and plans to go down with the ship.
Act 2
With great excitement, the pirates return to the lab and are eager to see what it is that is so valuable, but Basilia insists the Commodore be given medical attention. The pirates refuse, but Noting that he and his colleague, Broha, are the ones with the knowledge of how to find the ‘treasure’ as well as the skill to handle the pods necessary to reach so deep into the waters, Sombi convinces them to allow it. They head to the infirmary and there, Sombi accesses information about the ‘ship. The image is fuzzy, but the pirates fall into the belief that what lies at the bottom is a sunken Ferengi ship. Eager to give more time to the other officers that Sombi is sure will come rescue the away team, and them, he doesn’t tell them the truth - that they have interpreted the image incorrectly. Instead, he leads them on and tells them how they can get their ‘treasure’, though they will need his, and Broha’s, help.
Kells awakens and when he finds out about the plan to go into the ocean, he insists on going as well. Toz, however, nixes the idea and reminds him that he and Richards ,whom Kell also suggests, are both injured. One pirate is amused at the bickering, the other is annoyed, and finally, Nelv grabs the two researchers to head to the diving vehicle, the DSD, while Ru keeps guard on the rest of the crew. Quietly, while Ru is distracted by a call Kell asks Basilia if there’s any way she can get out and get to the Ra to send a message to the Thor.
On the bridge of the Thor, Greaves has told the crew to abandon ship and intends to pilot to the very end. Corelli and Kessler refuse to leave and remain with him while Ulasso heads to the escape pods. He realises his size takes up more room than most, and helps a family in a pod before deciding to return to the bridge and go down with the ship. Greaves calls all hands to brace for impact.
As the Thor tumbles into the sea, it lands upon its side. All through the ship, heavy damage is sustained. The bridge crew starts to deliberate about what to do, and each officer gives valid ideas and begins to implement them. Suddenly, dark shapes rise up from the depths of the sea, and massive creatures with sail-like spines appear and take a curious interest in the vessel. They begin swimming into and around the Thor which, precariously on its side, finally gives in and lands right side up. Not stopping there, the creatures manage to hoist the ship upon their backs and move it through the sea, the bridge just barely above the water line. Even so, the ship continues to get lower into the water.
Despite that, recovery is on the minds of the bridge crew, and since the creatures don’t seem to be causing harm, they are ignored for the moment. Each officer continues where he left off with their ideas and begins to work on them individually. Knowing that it will take working together rather than apart to be effective, Greaves calls them all to order and manges to get the holotable to work. He brings them to look at it and they decide on a plan of action - first, to get the comms working, then take it from there. He puts Kessler and Corelli on that task. To Brodie and Ulasso, Greaves orders them to see if they can restore internal sensors.
Leaving with Brodie, Ulasso opens the doors for him and the two start making their way through the ship. They come to one area open to the outside and water seeps in. As they start moving toward another area, a large, metre long, sharp toothed fish wriggles its way into the water in the ship. Brodie finds some sharp metal and, after wrapping his tunic around it to protect his hand, utilises it like a spear to fend off the fish. As Ulasso struggles with the door, Brodie slips just as the creature lunges, and it gets caught on and killed by the makeshift weapon. They then continue on.
Down in the corridor outside Sickbay, Kel, Katsim, and Reid find chaos. The call to abandon ship comes through and Kel treats the two women as best he can in the short amount of time available. Katsim refuses to leave, as does Reid, and Kel also decides to remain aboard. Katsim grabs a couple of medical kits and the three squirrels away in a jeffries tunnel. After the crash, Kel is sick but recovers quickly and the three decide to head to deck 9 and see if they can get a transporter working. Their first route is blocked, so they go to another, then suddenly find themselves following about as the ship is suddenly righted. They try to make contact to no avail. The three then continue to make their way to the next deck and try again, and Kel manages to reach the bridge.
Kessler and Corelli move over to the tactical station, which has withstood the beating unlike the Engineering station. He then asks Corelli if they can get power to a holodeck, perhaps they can create a holographic transmitter and receiver to use for communications. Corelli likes the idea, but the ship doesn’t have enough power. Instead, they build a short range transmitter. Using some parts of the ship combined with a combadge, Corelli effectively creates that transmitter, and gives it to Greaves just as a call comes through from Doctor Kel.
Greaves, happy to hear more of his crew’s voices, orders Kel and Reid to set up a casualty collection area on Deck 9 where Brodie and Ulasso will join them to help with casualties. To Katsim, he orders her to join Corelli and Kessler in Engineering and try to repair the ship as much as possible and get it moving. Kessler arms himself and Corelli with a couple of phasers, and they move off. As they move off, Kessler checks on Corelli, asking if he’s injured, but Corelli assures him he’s fine and the two continue on.
Katsim and Reid start back into the tunnels, but Katsim realises Reid is struggling, and so leaves her in the marine mess hall on Deck 9 where she can rest. She finds her way down to Engineering and discovers she is then joined by Ulasso, Brodie, Kel, Kessler, and Corelli. Brodie, Ulasso, and Kel gather the survivors in Engineering while Corelli figures out a plan, then warns Greaves what he wants to do - which includes severing the nacelles, welding shuttles just above the dorsal plasma vents of the impulse engines, gathering everything that could be used to create a huge power cell, and using those to give power for the Thor to sail through the water - though it wall require flooding decks eighteen through twenty-three.
Meanwhile at the research station, Basilia manages to sneak out once Ru is distracted, and Kells uses his injuries to pretend he’s in worse pain to add to it. Outside, the researchers and Pirate Nelv are witness to the fall of the Thor off into the ocean, though it is far in the distance. Nelve alerts his partner, and they contact their own people asking for more to come help, but static interrupts the transmission.
Basilia enters a corridor and witnesses the fall of the Thor through a window. When attempts to contact the ship are unsuccessful, she enters the Ra and uses it to emit a signal to jam the pirate’s communications with their own ship. She makes her way back to sickbay, phaser in hand, when a wave caused by the fallen ship washes over the Ra and rocks the outpost, tumbling everyone about. Kells and his officers take the opportunity to get out and head for the Ra, but Ru manages to jump on before they leave. He is bound and put under surveillance.
Outside, Nelv forces the researchers into the DSD and they go underwater. At the sight of a large fish, he begins to panic and tells them to raise some shields or do something to make it go away. Using the pirate’s fear to execute his own plan, Sombi floods the DSD, which has only moved a couple of metres below the surface, and he and Broha escape and Sombi, seeing the weapon now free, grabs it. When it becomes evident the pirate can not swim, Sombi goes to get him while Broha drains the water from the DSD and brings it to the surface. They get the pirate inside and start making their way back to the outpost. Nelv wakes up, and after finding out the researchers didn’t let him down, he is shocked - and actually offers to help them. From the sky, Basilia spies the two researchers in their vessel and brings it to the attention of the other officers. Kells suggests they rendezvous and try to take down the other pirate. It is then that Ru reveals he actually isn’t an enemy but a spy infiltrating the pirates and suggests they go to the atmosphere to contact his people. Kells commands that they do just that - then lies down before he falls down. They go up out of the atmosphere and come face to face with the pirate vessel.
Meanwhile, Sombi and Broha take Nelv back to the outpost. There, they release the prisoners, then decide to use the pirate shuttle to help the Thor. A couple of volunteers join them and they force the pirate to go along as well. They reach the Thor, then make contact with Major Greaves.
On the bridge, Greaves takes stock of the damage, then decides to reprogram the holo table to turn it into a command console which allows him to view the damage as well as gain control of ship functions. Just as he finishes, Second Lieutenant Henderson connects with the bridge from the main shuttlebay. Greaves asks him to use the transporters on any shuttle that will work to assist with search and rescue. Henderson acknowledges and disconnects the call to comply. Meanwhile, Greaves connects with other members of the team. Corelli tells him his plan to flood certain decks as well as utilising any working shuttles to get the ship moving now that the strange giant lizards had lost their interest. Greaves gives the rescue team twenty minutes to get people out of decks 18-23 so the plan can be enacted. He then receives a call from the researchers, but is uncertain as to whether they speak the truth. He then suggests they send a distress call from space if they are really who they say they are and turns his own focus back to his ship and his people.
Kel takes rocket boots that Corelli indicated were in his office and uses them in the turbolift to get to deck 10 quickly. After activating the Emergency Medical Hologram, he finds Counsellor Nesre Salo in her office. After digging her out, he and the EMH work on her injuries. Brodie and Ulasso head to deck 20 to evacuate those who are there after grabbing breathing apparatuses. Once there, they find an officer who, miraculously hasn’t drowned, then discovers there’s some sort of sea anemone attached to his ear and seems to be controlling the body. The two fight off the strange zombie along with a couple of others that appear, make it out of the water and then head back, unable to help the already deceased.
In orbit, the Pirate Captain receives the transmission and prepares to go down and assist his crew. A few minutes later, the shuttle with Kells, Basilia, Richards, and Toz gains orbit and contacts him. The Pirate laughs when Ru tries to attack and Toz puts him in his place. Basilia indicates they are trying to ascertain what happened to the Starfleet ship, then whispers her worries about the commodore to the others, and indicates maybe Richards should take over. Ru is offered back to the Pirate captain, but the leader merely beams Ru into space, killing him.
Meanwhile, the two researchers make their way into orbit. When Nelve tries something, Sombi knocks him out. After leaving the planet’s atmosphere, they see the pirate ship and shuttle. Sombi suggests Adodar bring them around behind and target the pirate vessel’s weapons and engines. They shoot and cause some damage, but the appearance of a Dominion sends both Starfleet ship and commandeered pirate vessel fleeing back to the surface.
Corelli, Katsim, and Kessler focus on implementing the plan, though Katsim encourages them not to rush through and make sure they give the other people time. Corelli dashes into the tubes to head up to deck four even as Kessler suggests they have Henderson, who’s managed to get a shuttle transporter functioning, do a site to site. The group get to the armoury, gather what’s needed, and Corelli heads to impulse fusion reaction core while Kessler and Katsim head down to the pylons. Once there, she and Kessler set the charges. In the core, Corelli realigns the necessary conduits, but is unable to make enough repairs to prevent a radiation link. After contacting Katsim, the science officer tells Henderson to be ready to beam Corelli away quickly to sickbay, then transport her and Kessler to the armoury afterward. A moment later, the transport completes and Katsim hits the detonator, detaching the nacelles from the Thor.
Act 3
Both the away team and the researchers have retreated toward the surface, but the pirate ship starts shooting at them from orbit. It then makes its way to the research outpost and steals the DSD. Richards manages to get sensors working enough to determine this, but no one can understand what they’re after. They then head back to the outpost to reset the system and gain control of the DSD remotely. Once they get there, the group finds a high barrier erected from crates and other objects pilfered from around the outpost. Before they can investigate the pirates fire upon them. Basilia and Sombi both get shot and Toz gives them painkillers so they can continue to function. Sombi points out that if someone shoots the top of the barrier, it should come crashing down on the pirates. The other officers discuss options, but Toz takes action, shoots at the debris and it indeed tumbles atop the pirates. Broha then leads the officers away to take another path to a lab where they can get control of the submerged research vessel.
The USS Oumuamua has arrived with Captain V’Airu at the helm along with acting first officer, Lt. Commander Roger Hartmann and Ensign Cabrillo among the crew. Taking a protected position in the upper atmosphere of a gas giant close by. There, they monitor the situation with the Dominion ship and pirate vessel, then brainstorm on what to do to assist the Thor and the research station without antagonising the ‘visitors’. Cabrillo suggests they send a probe to echo the signatures of other Starfleet ships, and Hartmann suggests they also do that with a runabout to not only cause further distraction, but to make it more mobile. V’Airu gives the go ahead and Hartmann heads to the runabout and launches, while Cabrillo sends out the probes. A few minutes later, the Dominion takes notice and raises their shields and weapons, but does not move from orbit, begging the question of what was so important as to remain there.
Greaves works on the bridge of the Thor with Kessler and Ulasso as well as Corelli to figure out a strategy to deal with the pirates. Upon receiving a call from Doctor Kel, things get heated between him and Greaves and the two snap at each other. Ulasso and Kel pass notes back and forth, and Katsim sends Greaves her own message in hopes of encouraging him.
In Sickbay, Katsim continues to take medication to stave off the symptoms of her injuries to assist Lt. Commander Brodie and Doctor V’Len Kel in Sickbay, treating those who had remained behind and were wounded. They stabilise those who are there, but are running out of supplies and only one barely working replicator. With minimal working replicators, Kel suggests they extract a compound from a fungus if it hasn’t been destroyed. Katsim searches for and locates it, but before they can begin the process, an alarm alerts them to a patient going into deadly shock. Using more primitive means, they are able to set up a way of syphoning toxins out of the body by using tubing and a bio gel pack from the ship. Thoughts turn to how to help with the burns, and Kel suggests they use salt and Krypton from the sea to help heal and power the dermal regenerators. Kel calls the bridge and asks if someone can obtain water.
After giving the helm to Kessler, Ulasso, along with Corelli, heads toward the outside of the ship in order to set up a periscope to see better and to set up a dorsal camouflage while Greaves touches base with Henderson again to see if any of the Valkyries are in working order and could fly beneath the water then set charges on the outpost. Unfortunately, they’re all unusable, but notes that there’s a worker bee still intact, though that requires getting closer to the outpost. Afterward, it’s a matter of simply getting to the outpost and the bridge goes quiet for a moment before another call comes in from Kel about the water. After contacting Ulasso and Corelli to ask them to retrieve it, the computer alerts Greaves that two shuttles have arrived at the outpost, meaning they can’t set the charges as planned.
Despite the bulk of the ship, Kessler ably steers the vessel to avoid another large wave and help protect the two officers out on the hull. They get the requested water and head back inside after getting a bit waterlogged. As the duo make their way back into the ship, Greaves realises that the drag of the water will affect anything they might shoot at the pirates, and then wonders if they will reach the intended destination. The ship decides to get a little closer and move more toward the surface, then launch torpedoes. The pirate vessel is destroyed. A moment later, Kessler picks up some residual trace patterns that match the Dominion and Commodore Kells has been taken.
Meanwhile, up in orbit, the ruse works for a while, but the Dominion discovers that all the ships are fake except for the Oumuamua. Hartmann moves into a position and uses an echo to make it look like it’s drifting radiation til it reaches the underbelly of the Dominion vessel where it takes up position. Once their cover is blown and the Dominion turns hostile, V’Airu gives the order to attack. The two ships engage and the runabout manages to get a shot off, but then the Dominion ship calls the Oumuamua. The Commodore and her crew are faced with a Founder who orders a cease of hostilities in accordance with the treaty of 2375 and tells them their perpetrator is the pirate captain Shok who is on the planet. The Dominion ship then leaves to head toward the wormhole to the Delta quadrant.
The Vorta on the Dominion ship transports to join the pirates as they retrieve whatever it is at the bottom of the ocean. They are successful, and the pirates find out it is, in fact, a changeling. Unlike last time, however, the changeling is not revered as a god and is taken back to the Dominion ship, but the Pirate Captain Shok is abandoned on the DSD. Unknown to him, the researchers have recalled the underwater vessel. Once on the surface, Shok gets back to his shuttle and escapes the planet.
Back on the Thor, Greaves has to make a decision - see if they can get the Thor in the air and go after the commodore, or help the stranded crew. It is then that a call from the Oumuamua comes through, and he and the crew find relief knowing that help has arrived.
Act 4
Several days pass while the Oumuamua helps recover the crew of the Thor and get the ship back into orbit. Commodore V’Airu connects with Greaves and Hartmann who are now acting as co-First Officers since the crew of the Thor has come onto the Oumuamua. Greaves is tasked with putting together an infiltration team while Hartmann is to oversee a way to get past Dominion shields as well as making sure the Oumuamua’s defences are ready should the need arise.
Greaves warns his team that not only are they going to infiltrate the Dominion ship, but to expect combat. While there is a team of marines with them, he also asks the officers for ideas on how to get out of dodge if the Oumuamua can’t transport them off. They prepare as much as they can, then simply have to wait. Hartmann calls and tells them to expect to transport at a moment’s notice.
Hartmann gathers his team in Engineering and the team discusses ways to cut through the Dominion shields. Kessler suggests penetrating the shields with a non energised device to cut a corridor through them as well as venting drive plasma near the ship and igniting it with tri-cobalt devices in order to damage their shields. Corelli takes Richards to replicate the parts they need for a torpedo casing without the warhead while Hartmann and Toz help Kessler prepare the ramscoops. The team in engineering manages to launch the modified torpedo. It sinks into the hull and remains there, providing a teleportation ‘tunnel’ thanks to the transporter that replaced the warhead. Greaves and his team are transported aboard the Dominion ship.
On the bridge, Katsim and Ulasso arrive. Vomek gives the helm to the Saurian and Katsim inquires as to what Commodore V’Airu’s orders are in regards to going after Commodore Kells. The three brainstorm about how to deal with the situation and suggestions are made. They listen in on a conversation and hear something about a trap on one of the moons, but can’t make out anything else. They eventually decide to follow the Dominion ship, thinking they can hide in a crater on the moon if need be. Suddenly, another ship appears, and they begin evasive manoeuvres.
When the time comes, Greaves and his team find themselves on the Dominion ship, but are faced with one of the local crew members. Brodie draws his phaser, but Kel is in the line of fire. and begins to shoot. Greaves uses his and stuns the crewman quickly before she has time to react. They move off to search for the brig, but a few minutes later, the lights dimmed and an alarm blared through the ship. Suddenly, they are under fire and trapped in a corridor. Kel gets stabbed and Greaves has to help him up and down the corridor to cover.
Down in Engineering, Hartmann and his team begin to go over the defences in case a firefight between the ships begin, when suddenly the systems start to overload. Commenting about a rushed refit, Hartmann sets Toz, Richards, and Corelli on task to stop a cascade before it can get worse.
On the bridge, earlier attempts to contact the Dominion ship went unanswered, but suddenly the tides are turned when the ship hails the Oumuamua. At first, someone appears to demand an end to hostile actions, but a vorta calls out for the person to stop. The link goes dead, then they are hailed again and that time are greeted by the Vorta who agrees to return Kells in exchange for a peaceable halt to aggressions. The Vorta also contacts the away team on the Dominion ship and promises that they will not be harmed, then asks them to come to the bridge. Greaves agrees, but only if they transfer the COmmodore and Kel, both injured, back to the Oumuamua. The Vorta agrees. Once in sickbay, the EMH is activated due to minimal staff and he tends to Kel who, he says, will need a replacement heart.
Back in Engineering, things start to go bad very quickly. The group tries to quickly contain the impending cascade failure which causes lights to flicker in the middle of the negotiations. With some time and effort, Corelli and Kessler are able to prevent a total failure and get the systems back up and running.
After the away party arrives, the Vorta and his crew keep their word and they are transported directly to sickbay. Kel’s injuries are significant enough to require him to be tended to immediately by a medical officer.
Meanwhile, the Bridge and the Dominion crew are joined by a Cenobian officer who proclaims they are forming an alliance with the Vorta and theirs. The Vorta talks about a new organisation, much like the Federation, called the United Dominion of Planets. Linguistically, the verbage used indicates a more peaceful type of dominion rather than one that indicates a dictatorship. The three ships seem to come to an understanding and the Cenobian proclaims that all use of mercenaries on part of the Vorta and their crew will cease immediately, and Cenobians will take up the slack before she signs off. After another brief exchange, the Vorta agrees to return the rest of the away party, and the two ships part ways peacefully - for now.
Officers
- Commanding Officer, Commodore Aron Kells
- Executive Officer, Major Wes Greaves
- Chief Counselor, Lt. Commander Alexander Brodie
- Chief Science Officer, Lieutenant Peri Katsim
- Assistant Chief of Security, Lieutenant Anton Richards
- Acting Chief Medical Officer, Lieutenant JG V'Len Kel
- Security Officer, Ensign Isabelle Basilia
- Tactical Officer, Ensign Jack Kessler
- Acting Chief Engineer, Lieutenant JG Kammus Corelli
- Science Officer, Lieutenant JG Kizanna Reid
- Medical Officer, Ensign Toz
- HCO Officer, Ensign Ulasso