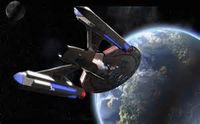
Missing In Action (USS Oumuamua)
| USS Oumuamua | ||
|---|---|---|
 ACTIVE STATUS | ||
| ||
The USS Caboto is tasked with escorting a diplomatic envoy to meet with the United Dominion of Planets for diplomatic discussions. On their way there, they are onset by three mysterious, unknown vessels and prepare for a fight.
When the USS Caboto fails to check in, Admiral Egan Manno sends the USS Oumuamua to investigate a debris field which seems to contain some Starfleet material to reconstruct what happened while other ships search for the missing vessel.
Lieutenant Corelli along with Commander Brodie, Doctor Toz, and Ensign Mairi Douglas to analyse the debris in the field, save for the transponder, in the hopes of gathering clues to what occurred. He quickly briefs his team and indicates they should look at all the pieces, even the tiny ones and orders thorough organic and electromagnetic scans as well as a low level ionising gamma particle resonance scan. Toz notes there is some organic material in the debris, and Douglas discovers something strange that seems to be made of a triduranitrium alloy. Corelli’s attention turns to a black, glassy material and he and Toz ponder whether or not it could be something fossilised. As scanning continues, Douglas indicates that there’s material there that’s definitely not Starfleet, and it matches the alloy she mentioned earlier, and that one fragment, something that she suspects comes from some sort of weapon, contains some Theta radiation. While Douglas starts to run a modelling program to try and get an idea of what the fragment looked like before it was sheared off, Corelli asks if Toz can replicate something to protect them from theta radiation as the Commodore’s call warning them about the Zet comes through.
As the group continues to search for answers, Corelli tries to get them thinking by asking for theories surrounding what they’ve already found. After throwing around some ideas, Corelli realises that it’s actually from an antimatter reaction vessel secondary regulation matrix with adjunct waste flow processing - a very, very crude one. The officers regroup and set about trying to dissipate the radiation from the materials, find the warp signature, and build a working model of the crude engine. Brodie points out if someone gave the Zet warp capabilities, there could be something unique to help determine who it was as well as gives some personal insight in regards to the Zet. Douglas finds the warp signature and suggests sending the information to the bridge.
Since some of the debris could not be opened to look inside. Corelli plans to just slice it up, while Douglas suggests modifying the scanners to penetrate, but the Chief Engineer elects to slice and dice. He orders the computer to place a containment field around the transporter chamber and puts the debris they’re trying to look into within the chamber. Taking a phaser, he orders the computer to open a hole just long enough for him to use the phaser and open up the mass. Once they can see inside, they discover it’s some sort of weapon, but from what civilisation is uncertain. Suddenly, the ship goes into red alert. Brodie contacts the bridge and finds out the situation. Toz places some of the discovered organic material under a microscope and scans it to discover it’s Deltan. Once apprised, the Douglas moves to Engineering to assist with any forthcoming repairs and keeping systems at optimal functionality, then makes some fine tuning adjustments to help with speed and agility for the expected fight. Meanwhile, Toz heads to engineering with the organic material. After further study, she finds it’s Deltan and that whomever it belongs to is likely seriously injured. She reports her findings to the Commodore, who sends Corelli to sickbay.
Doctor Kel, Lieutenant Katsim, and Ensign Avander Promontory are tasked with dissecting what seems to be a partial transponder in the hopes of recovering any data that might indicate what has happened. The group starts picking apart what’s left of the transponder and salvaging what isn’t damaged. After connecting it to the ship, they find themselves with corrupt data among the good, and work together to seek out the metadata and rebuild the framework. A few minutes later, something flashes on the screen - a strange looking ship that almost reminds them of a Romulan ship, but with some distinct, non-Romulan features. Commodore V’Airu’s call warning that they’ve discovered the Zet are believed to have attacked the Caboto
Kel tells Katsim to send the image to the bridge and warn them about the theta weapon that the vessel seems to have according to the information they’ve gathered. Kel asks for permission to start innoculating the crew against Theta radiation while Promontory reads what information he can about the Zet. He sends Nurse Rox to work on the crew at large while Kel himself innoculates those with him. The trio work on trying to glean more information. They discover confirmation of Zet technology, and that weapons used were radiation based and could possibly penetrate shields. With this disturbing news, Katsim contacts the bridge and updates the Commodore just as the ship goes into red alert against a triple vessel threat. After a moment of further perusal, the trio make their way to the bridge.
Commander Greaves takes control of the bridge and oversees the bridge with Ensign Toxin Arlill until Commodore V’Airu can speak with Lieutenant Kessler about his father, who went missing along with the Caboto, and bring him back on duty. Upon his arrival, Kessler immediately compares scans between what the Oumuamua has gathered and what the Nashira originally found while Arlill notes the differences in some recovered gel packs. Arlill finds four Starfleet signatures in the area, but a fourth, unidentified one is detected as well. That, coupled with the discovery of non starfleet debris, leads them to realign the sensor array, which then detects the signature of a vessel belonging to the Zet. Kessler struggles silently, but Greaves notices and offers a private word of encouragement.
Unable to find a warp signature, Greaves suggests they sweep for some other information that might lead them forward. Arlill suggests they use information from the scans of other starfleet ships to create a dimensional model of the region and rule out subspace resonance. Combining that along with tying sensors to the deflector dish, Arlill suspects they might be able to find the decaying warp trail that way. V’Airu takes the opportunity to warn the other teams about the possibility of Zet involvement, and Doctor Kel states he wants to innoculate the crew against Theta radiation, then asks Greaves what he thinks about requesting help from the UDP. After setting up the sensors according to Arlill’s suggestion, Kessler finds the warp trail, but surprisingly, it leads away from the Zet homeworld, not toward. Arlill speaks up and warns that Theta radiation levels in Cargo Bay 3 are detected, likely from the crews' examination of the debris and suggests erecting fields to contain it. Greaves notes all signs indicate someone has helped the Zet achieve warp technology and voices a concern that if they follow the trail, they’re heading into an ambush. Meanwhile, Nurse Rox comes around and dispenses medication to protect from theta radiation as the Commodore orders the ship to follow the trail.
Kessler announces the detection of a possible vessel on the outermost edge of sensor range. Sensors are unable to determine anything other than it is not federation, and the Commodore calls for yellow alert. Greaves inquires as to whether or not they can determine if the trail was caused by multiple ships and Arlill notes odd readings aft of the ship and one of the transporter arrays reporting elevated theta radiation exposure. Concerned that there might be a ship behind the Oumuamua, he suggests to the Commodore they go to red alert. With the Oumaumua travelling at warp 12, Kessler wonders who could have such technology in the Gamma quadrant. After studying the trail, he also determines there is one ship ahead of them and one or two behind, and offers insight to what sort of tactics anyone could use to cut them off and disable the Oumuamua. V’Airu calls for a full stop and they attempt to hail the detected ship as Lt. Katsim confirms Zet tech and warns them that they seem to have radiation based weaponry which might be able to penetrate shields. One ship turns into two, and then a third appears and the levels of Theta radiation increase.
With the possibility of a conflict, Arlill notes if they can generate a warp field and invert the positive charged ions projecting them against the hull, it should prevent the radiation from binding to the molecular structure impeding the potential damage to the Oumuamua’s structural integrity. As he studies the third ship and realises while it is of similar configuration, it has a slightly different design and he ponders whether or not the Zet are testing new designs against Federation vessels. Kessler suggests they go to warp briefly to get on the ‘doorstep’ of the closest vessel, and use her as a shield against the others. V’Airu approves both plans and wonders if the UDP is behind assisting the Zet in their sudden advance in technology.
Finally, the Zet ships make contact and demand payment for passage through Zet space from a Zet by the name of Anncol. As they talk, Greaves tells the Commodore that the other is no longer on an intercept course, but is running away from them now. Kessler discovers it’s because of a radiation mine launched by the ship they have encountered, and they arm phasers to deal with the assault. They get a direct hit and the ship continues to run while the other two continue to close in on him. Arlill suggests they force those ships into a nearby asteroid field which would prevent them from using warp speed. Doctor Kel, Lt. Katsim, and Ensign Promontory arrive and take stations. Katsim realises that while whatever they have done to the shields is helping lower radiation seepage, the levels are still rising. She attempts to modify transporter biofilters to help further and radiation levels begin to drop.
After escaping what was evidently some sort of trap and rendezvousing with the USS Nashira and USS Sekhmet, V’Airu and the crew of the Oumuamua head over to Port Coray, an independent trading station, after the Nashira shared a mysterious new power uses it as a primary trading hub. The power is suspected to be the Zet, and the crew head there in the hopes of finding out more about what happened to the Caboto. As the teams are formed and head out, the Oumuamua itself remains hidden behind Ara Coray’s, the planet that the station orbits, third moon.
Greaves along with Kel, Corelli, and Promontory are beamed down to the station to investigate matters personally undercover as independent traders. As they arrive, Kel passes on a message from Rox about a tsunkatse match, then recognises a tune that had been played by a group that had once visited Captain Kirk and his crew on the USS Enterprise. The group make their way to a more public area and Promontory asks if they should split up. They do so briefly, each making a circle to see what they can see and meet back at a bar. There, a trio of Nausicaans entered, making demands. It seems a fight is inevitable, and Greaves wonders if they can make friends by helping deal with the Nausicaans. Promontory tries to use a neural neutralizer he procure during his round through the station, but it fizzles and is thrown across the room. Getting right back up, he launches into the fray.
Greaves joins him in order to better protect Promontory. A moment later and it’s all over, thanks to a delayed reaction from the neutralizer. In gratitude, one of the patrons offers to buy them a drink in a lounge on deck 42 - the very deck mentioned by someone Kel had run into during his survey of the area. They are led to the deck and to a lounge called “The Ophidian”, a place where the clientele are more ‘discerning’. There, between two heavy curtains pulled back, Corelli spies a Vorta, though not the same one they had encountered previously. The female patron introduces herself as Voxia and gets them drinks while she asks what they’re looking for. Greaves indicates they’re seeking information. Kel notices some commotion and asks Voxia what’s happening, and the group are told it’s a slave market. Corelli pretends he’s going to go ‘shopping’ and Promontory joins him while Greaves tries to get more information out of their new ‘friends’.
Kel holds back and tries to get Greaves to call the Oumuamua, but the First officer refuses. Irritated, Kel joins Corelli and Promontory as a ‘bouncer’ comes up to them. Kel offers to assist the slaves so they are more marketable, but only as long as he gets something in return. The bouncer agrees.
Promontory tries to hack into the database to search for information about a ship from the Alpha quadrant while Corelli wonders if they can modify an isolinear chip they have possession of to show that they have more ‘latinum’ than they really do. As they work, Promontory discovers a Zet social media network. Kel starts assisting the prisoners and Greaves motions toward a desk and tells Promontory to see if he can get information from it. The ensign takes scans, then shows an interesting log entry to Greaves.
As they work in the area, Kel discovers a trio of children kept behind bars. Hurrying back to his fellow officers, he tells them of the kids. The group elect to fight the bouncer so they can get the kids and free the children - and ,of course, Katsim’s vibrating message comes through right in the thick of things. Kel manages to get a sedative into the bouncer, then heads to check on the children while Greaves, Promontory, and Corelli continue the fight until the sedative. They reunite with Kel and the children only moments later.
More guards come, and the Officers stun them. Kel tells some of the prisoners that they’ll be back, but Krystal, the female child, manages to steal the keys Kel had taken while they were distracted by the firefight and passes them along to a Jem’Hadar prisoner without them noticing. The group continues on to try and keep going. Out in a more open area, there is a ruckus, a large group of insect-like aliens suddenly take to flight and a horde hovers in the air. The group quickly moves on, briefly getting separated from the kids, then regrouping.
Lom’a, a man who had helped them earlier, ushers them into a hallway. When Promontory lets slip an address that indicates they are not smugglers followed by a call from the Oumuamua, a fight breaks out. Greaves is wounded and knocked out. Krystal and Eriske work together to drag him toward a set of doors on the other side of the hall, then huddle together. Kel joins them while Promontory and Corelli disable Jom’a. Then the group gets out of range of the dampening field and returns to the Oumuamua. Corelli updates the bridge on their status while Greaves is treated and states they’ll need some counsellors in sickbay.
Commodore V’Airu leaves Kessler in charge of the bridge, accompanied by Katsim and Douglas. Kessler checks in with both and asks for the current status. Katsim reports the away team was successfully beamed onto the station and there are three vessels also approaching Port Coray. While they are there, Katsim discovers a ship is headed straight for their location. Upon arrival, they find it commanded by another Vorta, Luriaa who asks what they are doing there. Kessler admits they are looking for a ship, but are also interested in finding out more since the Port is supposedly an open trade station. The vorta agrees to let them remain and search for evidence of their ship. They move out into the open and Katsim discovers Zet lifesigns, though there is no trace of Theta radiation. The group decide to warn the two away teams down on the Port. Katsim sends a message to the Commodore’s tricorder, but with Greaves and his team in a populated area, she elects to send a covert message through his badge using morse code.
That done, the group tries to find a way to access the Zet database. After trying, unsuccessfully, to create a TidBitter™ account, but Kessler backtracks out of concern they might accidentally let through some sort of alien virus. Katsim gets the idea to access the information they were able to get when the Thor visited the Zet homeworld. Vomek is able to find the name of a recently executed administrator, and his access codes are available in the database information taken from Thor. Once in, they discover a line that refers to some sort of ship and her crew. Kessler asks Vomek to check on the away teams and suddenly the communications go crazy as strange events unfold on Port Coray. An attempt to get a transporter lock on Greaves and his team is unsuccessful. The three brainstorm about how to get them out of there when the team start moving again and gets out of the dampening field, allowing them to lock on and transport them all to Sickbay. Meanwhile, the Dominion ship has returned and is hailing them - and Kessler indicates he wishes to file a grievance with the UDP.
After talking with the Starfleet ship, Luriaa consults with her 2nd, Fraya. The two are suspicious of Starfleet, but do not wish to be hostile. Instead, they decided to help by reaching out and seeing if there is any news of any other Starfleet ships, much as a way of keeping an eye on them as anything. They also elect to go down to the port themselves when Fraya discovers evidence of Starfleet tech being sold on the market.
On the UDP Rij’dal’vak, the ship that encountered the Oumuamua, Captain Luriaa pulls aside her 2nd and discusses the true motivation for Starfleet’s presence, concerned they might cause problems for their fledgling organisation. In order to keep a close eye on them, they decide to help the Oumuamua search for the missing vessel.
On the shuttle called the York, Rouiancet, Toz, and Arlill set out for the planet on a covert mission to figure out where ships coming from the planet are originating. They discover they come from the side opposite from where the station is located. Although the planet has abundant plant and animal life, there is no sentient life on the planet, making the lack of any colonies rather suspicious. Due to the weather, the shuttle has difficulty getting scans, though they can detect some thermal signatures on a mountainous continent just north of the southernmost continent on the planet. Rouiancet tells them to pass over the areas with excess heat to see if they can find something.
Though they see nothing visually, they decide to land and see if closer ranged scans work and wonder if there’s something underground. Toz notices the shrubs are blue and wonders if it could be caused by some sort of chemical build up from ship construction, and wants to take a sample. Rouiancet orders them to land and deploy the GPR scans. Oddly, the computer can’t assess what type of material makes up the surface of the area, as if it’s not there, though there are no indications of holograms and they can see and feel it. They find cargo stacked at the entrance to a cave. Upon opening a box, they find it contains smaller compartments and boxes, and Rouiancet’s tricorder reads that there’s some sort of black oxide compound, which Arlill wonders if that could be used to shield weapons being transported there, then finds a door inside the cave itself. As they continue to study what’s in the box, they discover there are Starfleet replicated components. They don’t get far, however, as a mechanical sound comes from the door, and the group takes cover. Two humanoids come out to check the boxes and Toz whispers that if they time it right, they can sneak in behind them. The group manage to make it inside and find themselves in a hallway. Inside, there’s less interference, and the tricorder gives them readings of a complex within the cave. Thinking some large, open domed areas must be where ships are located, the group heads in that direction.
Despite their attempts to be covert, Rouiancet and her group are discovered and Toz is shot in the shoulder. Taking cover, they face off against ten others, outnumbered. Rouiancet quickly staunches the bleeding as best she can and uses a small dermal regenerator to help until they can get her better treated. Still functional, the group split up, Toz going one way, and Rouiancet and Arlill going another, the latter heading toward what seems to be a factory floor. They register life signs in the facility, but the way seems to be clear. They continue on, finding more crates. As they come to a large, open room, they find a window that looks out onto the facility - and find it is, indeed, a factory. They can see some ships, and Rouiancet asks if any look familiar to Arlill. The Ensign isn’t 100%, but thinks the tricorder is registering some Federation composite materials, but also acknowledges it could be from another non-zet ship, not strictly Starfleet. He theorises that if they can knock out their EPS system, then they can delay launch of any ships and perhaps expose the facility to Port Coray. Rouiancet suggests they do so and use that as a distraction while they search for the Federation technology. Vomek calls and asks for an update. After explaining the situation, Rouiancet requests the ship monitors for the York’s return in case they need a quick escape. The two knock out the systems and go searching and find salvaged parts from the Caboto. After finding evidence of Caboto parts in the Zet factory, Rouiancet and Arlill have returned to the Oumuamua. Toz manages to make her own way back after coming face to face with a not so smart worker in the factory.
On the USS Nichols, a new skiff for the Oumuamua, Commodore V’Airu and Brodie head toward Port Coray from a different angle in the hopes of finding the Changeling known as the Lost One and perhaps have a chance to speak to him diplomatically. As they travel, Brodie gives the Commodore more details about the Zet, and V’Airu asks him to help make sure she’s not subconsciously blind to any UDP involvement because she wants a diplomatic relationship with them. Brodie warns that they might project the idea that the Federation wants a foothold in the Gamma quadrant, whether or not that is true. The counsellor encourages her to just be honest, or they won’t be able to detect any deception and it will hopefully keep them distracted from their other teams. The two make contact with Port Coray and are allowed to dock. As the two discuss strategy, V’Airu suggests they request a direct line to the Lost One and try to access the communications network with their badges. Concerned this might backfire, Brodie suggests they simply ask if a member of the UDP is available. Once they dock, the two disembark and find themselves (thanks to the tricorder’s translations) near the Ceremonial, Administration, and Techmaker areas of the base. Brodie suggests heading to the Ceremonial or Administration areas as they will provide better opportunities for meeting anyone with the UDP.
The two walk through the area and eventually find themselves face to face with the Changeling known as ‘The Lost One’. V’Airu indicates they are looking for a lost ship, but the Lost One says there are no others there. It is then she elects to ask point blank whether or not the UDP is aiding the Zet, for they are believed to be the ones who attacked the Caboto. They converse, and V’Airu warns the Lost One to think about who the UDP has ‘gone to bed’ with.
With all the away teams back on the Oumuamua, V’Airu has taken command once again to deal with any backlash from her meeting with the UDP and the Oumuamua sits in a docking bay on Port Coray. After showing, Promontory joins her, Vomek and Kessler on the bridge and provides his thoughts on what has been discovered thus far. Kessler points out the information they had on the Zet from the previous mission and sets about re-establishing a link and finds their weapons data. Promontory finds a list of standing orders to the Zet fleet. Kessler found documentation of low level directed energy weapons to polaron cannons, a similar method employed by the Pakleds. Further investigation reveals a mix of high and low tech abilities, but nothing that would overpower or be a match for Starfleet technology, and they wonder if despicable tactics were used to overcome the Caboto. Kessler suggests they look at the navigational logs and see whether or not the ship was anywhere near the Caboto’s flight path, and Vomek points out that all the TidBitter™ posts have a location tag associated with them - and by finishing an account, he might be able to account for Executive members’ movements. V’Airu requests they look at the registration files to learn what Zet have been collecting as Promontory wonders what the DPS motivation to help the Zet is, and Vomek points out that the Zet deal in intel as well as commerce.
Their discussion is interrupted by a call that indicates the ‘warranty’ on the Oumuamua has expired. V’Airu agrees with Vomek’s suggestion to contact Corelli and make sure no systems have been vandalised. They resume their discussion about motivation, and Kessler wonders if the UDP is simply using the Zet with plans to drop them once they have more powerful planets or to make themselves look like heroes if they solve the problems the Federation has with the Zet and them attacking Starfleet ships. Promontory agrees, and that historically, there are precedents for such decisions. As the conversation had commenced, he had continued to scan the logs and found a large number of sentient beings had been recently delivered to ‘select holdings’ on level 42 of Port Coray, and the same ship also exported a large amount of material from the same source to their previous rendezvous.
The three try to figure out how to approach the matter with the UDP, and Kessler suggests they go straight to the changeling known as the Lost One while Vomek brings up some things he’s found on TidBitter and where they originate, but is uncertain as to their meaning. V’Airu tells Kessler to inform Greaves of their plan to reach out before sending out marines, and Vomek fields some incoming information that seems to be someone reaching out to V’Airu.
Captain Luriaa connects with the Oumuamua and indicates they have found a piece of Starfleet technology, and they are willing to give it in good will along with the location where it was discovered. It is transported over to the Oumuamua and confirmed to be a piece of the Caboto. During their conversation, V’Airu also speaks with the Lost One. While the Zet are indicated in the attack, neither Captain Luriaa nor the Lost One are willing to put the blame on the people as a whole and suggest they look for the specific culprits instead. THey do offer to continue the investigation, and the Oumuamua departs to go to the coordinates where the piece of the Caboto was found. Once there, they confirm the debris does belong to the missing ship. They find bodies, but also survivors. The survivors are beamed to sickbay, the deceased to Cargo Bay 3 where Promontory volunteers to help identify the deceased - and V’Airu says she’ll join him shortly.
Doctors Kel and Toz join Colonel Greaves and Commander Brodie in the arboretum with the children to try and coax more information about what happened out of them. They start gently, and Eriske and Ardox respond well, but Krystal is unwilling to beat around the bush. The children tell them that they had been taken by armed aliens with lots of eyes who had boarded the ship and forced them into strange looking shuttles in the cargo bay. Krystal notes they would have likely held on to her father - because he was captain on the ship. This causes confusion since the Captain of the Caboto is Kessler’s father. Krysta does help them confirm that their attackers were the Zet just before they receive notice of a slave revolt on Port Coray. Kel suspects Krystal who confirms that it was because of her they were able to escape. The children are led to quarters to rest while the adults discuss the situation. They make a plan to head to Port Coray and assist the freed slaves, but discover they have gone to warp. Subsequently, they see that they have arrived at another debris field believed to contain matter from the Caboto - and there are survivors. Armed with this information, Toz, Brodie and Kel head to sickbay.
Corelli gathers with Katsim and Arlill to find effective measures and countermeasures against the Zet, particularly the theta radiation. Kessler suggests putting the ship into a geodesic sphere, constructed of drones which contain shield emitters and tractor beams which would lower their offensive capabilities, but would prevent the ship from being affected by the theta radiation, though it would likely fail after the first attack, and joked it was better than covering the ship in water. Katsim wonders if they could use radiometric converters, devices that absorb any theta radiation produced by Federation ships in breaking down antimatter, but use them on the outside to absorb radiation from a weapon. Arlill suggests removing some of the plating to tap directly into the shield grief and disperse the energy there. Katsim then wonders if they could combine all the ideas by using a bubble and converters and then syphoning the power and Corelli suggests they do that and have a collection point. The group turns to what offensive options they have, but they all hope they don’t have to deal with more attacks. They get a plan of action and set out to accomplish it in a quick turn around of three hours, hoping they can achieve that goal.
The Oumuamua arrives at the coordinates given to them by Luriaa and finds another debris field. As they do so, another post goes viral on TidBitter™, an image of a damaged Intrepid class starship. Since there is no location marker and not enough information to determine the location, Promontory suggests they send the information to Luriaa and the Lost One in the hopes they will help while he and Vomek attempt to triangulate according to the coordinates along with the information from the tags on the social media network. The bridge begins a scan of the fields and they discover survivors, whom they immediately transport to Sickbay and the deceased to Cargo Bay 3.
- Commanding Officer, Commodore Ossa V'Airu
- Executive Officer, Major Wes Greaves
- Chief Counselor, Lt. Commander Alexander Brodie
- Chief Science Officer, Lieutenant Peri Katsim
- Chief Medical Officer, Lieutenant V'Len Kel
- Tactical Officer, Lieutenant JG Jack Kessler
- Chief Engineer, Lieutenant Kammus Corelli
- Medical Officer, Lieutenant JG Toz
- Engineering Officer, Ensign Mairi Douglas (AWOL midway)
- Operations Officer, Ensign Toxin Arlill
- Intelligence Officer, Ensign Avander Promontory