 Akira-class Main Bridge Layout |
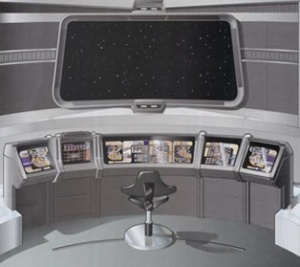
Primary operational control of the Akira Class is provided by the Main Bridge, located at the top of the primary hull. It is located on Deck 1. The Main Bridge directly supervises all primary mission operations (with the exception of the Flight bay and assorted craft) and coordinates all departmental activities.
Unlike the rest of the ship, the Bridge is a highly restricted area; only Beta-Two security clearance personnel (Officers with the Rank of Ensign or Higher) and authorized bridge personnel are allowed on the bridge. All bridge officers carry a type II phaser for personal safety in the event of a boarding party or accident. In the event of an emergency, the highest ranking Bridge Officer takes command if the Captain or First Officer are not present.
The Main Bridge is an ejectable module, allowing for a wider variety in mission parameters. This is called the Saucer Section and has limited abilities as a single component, including a retractable warp drive assembly capable of Warp 1, and a single Type-4 forward phaser bank that becomes operable only upon separation.
The primary configuration used by Akira Class in the 2370s and beyond comes from experience gathered from both the Sovereign class and Intrepid class starships
|
|
|
Sample Bridge Layout
The standard layout of the Akira-class is as follows:
- 01. Commanding Officer's Chair
- 02. Executive Officer's Chair
- 03. Counselor's Chair
- 04. Helm Console
- 05. Ops Console
- 06. Tactical/Strategic Operations Console
- 07. Engineering I Console
- 08. Science I Console
- 09. Security Console
- 10. Communications Console
- 11. Science II Console
- 12. Marine Console
- 13. Engineering II Console
- 14. Shuttle Console
- 15. Tactical II Console
- 16. Medical Console
- 17. Transporter Room
- 18. Dedication
- 19. Briefing/Observation Lounge
- 20. Turbo Lift
|
|
|
Captain's Chair
The Captain's Chair is raised from the rest of the Bridge Officers with a central view of the viewscreen so they would be the first point of contact for any on screen communication. Into the arm of the chair, the Captain has a purpose built console with access to all departments and communications.
The picture is an example of a similar chair found on the Ronin.
|
|
|
Helm/Conn/Ops
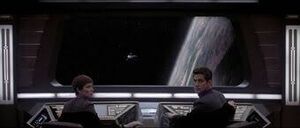
Directly fore of the command area is the Helm/Conn/Ops, who faces the main viewer. The HCO is equipped with a console that proceeds around an almost one hundred and eighty degree angle, giving them the maximum space to do what is is Helm Officers do. Their duties are innumerable and it takes a lot of calculations to keep a ship aloft in space. Most of the controls adhere to the Helm area of work and thus control many functions of the ship. However, this station also controls some of the Operations command functions, making the Helm Officer adaptable to fill in for the Operations Officer.
|
|
Viewscreen
At the very front of the bridge chamber is a large view screen. This main viewer performs all the standard duties expected of it. However, the view screen is not always activated like most other Starships. It is a full Holographic display, that can be activated upon request. When the screen is not active, a standard bulkhead is present. This addition was made into the Akira Class, so that Star-Field syndrome among Bridge officers would be stopped. Too many officers became hypnotized during warp.
|
|
|
Tactical/Security
Aft and either side of the command area is an elevated platform on which is located the tactical/security control stations (comprised of two consoles; designated Tactical One and Tactical Two/Mission Ops). With the consoles now at the rear of the Command Chair, the Tactical Officers would be able to see situations developing and react quickly in accordance with what was needed. The Mission Operations Officer can double as a Tactical Officer in certain situations. Tactical Officers are meant to be the peak in Starfleet's strategists.
The displays control both the weapons and shields as well as the tactical sensors that can target specific areas of an enemy vessel.
|
|
|
Operations
To the Captain's far right is the Operations manager's console. The Operations manager is located close to the front of the Bridge near the helm section. The Operations Panel, due to the tremendous amount of sensitive information found there, has security protocols as stringent as the TAC consoles.
This console is mainly used in-flight and in non-emergency situations. The Mission Ops console is used during Red Alert and Away Team missions.
|
|
|
Science Station
Against the port side walls of the main bridge are the consoles for Science and others that are programmable for a multitude of functions. Science has priority links to Conn, Ops, Computers, and Tactical. The place of a Science Officer on the Bridge was not always a vital position to take into account, however, as missions have become scientifically demanding, the presence of a Science Officer has arisen.
The position on the Bridge is to immediately be able to advise on all Scientific matters and instances that could crop up when navigating through unknown and uncharted systems. Besides, it's always handy to have one around.
|
|
|
Engineering Station
Against the starboard wall of the main bridge is the large engineering console. This has a smaller cutaway diagram of the Akira Class, which displays all engineering-relevant data and shows warp fields and engine output. This console also has priority links to the computers, the WPS (Warp Propulsion System), the IPS (Impulse Propulsion System), navigation, SIF, and IDF. Although usually unattended, the Chief Engineer can bring this console to full Enable mode by entering voice codes and undergoing a retinal scan. Directly aft of this console is the Engineering II console, which is fully programmable to run any Secondary Console function, including Sciences, Medical, Operations, Limited Helm control, or Security.
|
|
|
Master Systems Display
Also located on the platform, against the aft wall of the bridge, is a large master systems display monitor, similar to the one in main engineering. All relative ship information (such as damage, power distribution, etc.) is displayed on the cutaway image of the Akira Class. This monitor can be used to direct ship operations and can be configured for limited flight control if necessary.
This console, as does every console on the bridge, also has the hand-input sub-console for use in setting the auto-Destruct of Akira Class. The auto-destruct sequence follows Standard Starfleet security procedures which can be accessed via any secured Memory Alpha ODN connection.
|
|
|
Turbolifts
There are two turbolifts on the bridge that can handle normal transit around the Akira Class. There is also an emergency ladder that connects the bridge to Deck two. There is also one door, on the aft platform of the bridge, that leads to the Conference Room, which is directly aft of the Main Bridge. Other connected rooms to the Main Bridge include the Captain's Ready Room.
|

